Amazon Simple Storage Service (S3) is not only a versatile storage solution but also a powerful platform to host static websites. In this guide, we will walk you through the process of setting up a basic static website using Amazon S3, all from within the AWS Console
1. Introduction to Static Websites
A static website is made up of fixed files such as HTML, CSS, JavaScript, and images, which are delivered directly to a user’s browser without any server-side processing. Unlike dynamic websites that generate content on the fly using databases or application servers, static sites always display the same content to every visitor. As a result, they load faster and are easier to manage. Moreover, they are a great choice for portfolios, blogs, documentation, landing pages, or any site where content changes rarely.
In addition, static websites are secure, cost-effective, and simple to scale globally with the help of a content delivery network (CDN). When you deploy your static site on Amazon S3, you can store files in a bucket and enable static website hosting. After that, your website can be accessed over the internet with high availability and durability. Finally, you can integrate services like Route 53 for domain mapping and CloudFront for faster global delivery.
2. Setting Up Your S3 Bucket for Website Hosting
Step 1: Log in to the AWS Management Console
Begin by navigating to the AWS Management Console.
After reaching the login page, enter your credentials to access your account.
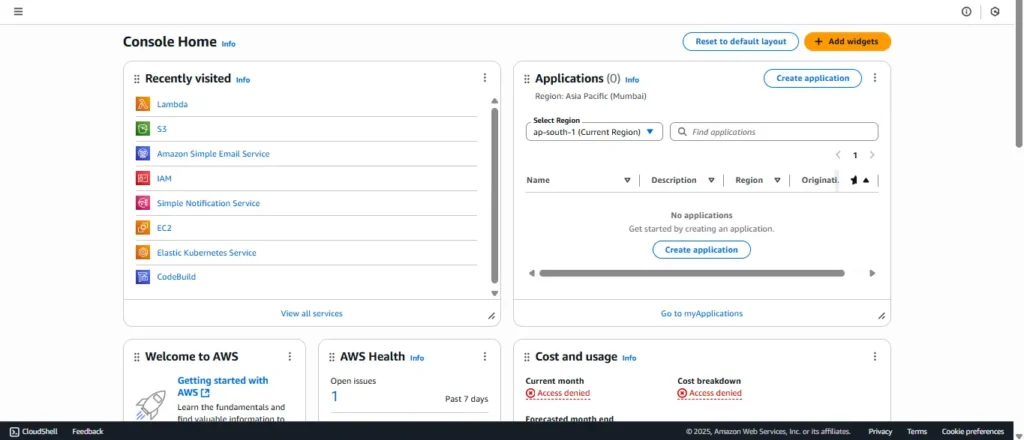
Step 2: Create an S3 Bucket
From the dashboard, click on Services and choose S3 under the Storage category.
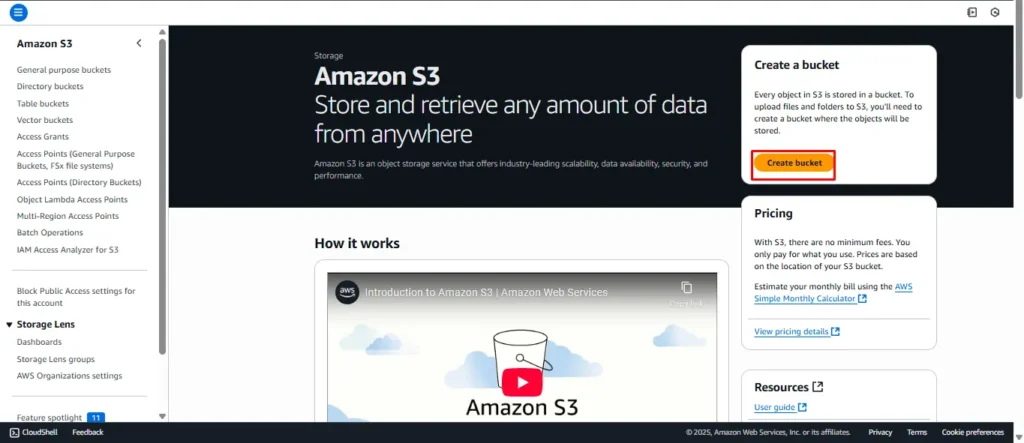
Next, select the + Create Bucket option.
Give your bucket a name that matches your domain or subdomain (for example, my-static-website.com). To ensure accessibility, make sure the bucket is set to public.
After that, pick a region that best suits your audience.
Finally, review the settings and click Create to complete the process
Step 3: Enable Static Website Hosting
Once the bucket is ready, open it and go to the Properties tab.
Then, scroll to the Static website hosting section and click Edit.
Select Use this bucket to host a website.
Specify index.html as the Index document and, if available, error.html as the Error document.
When finished, save your changes to enable hosting.


3. Uploading Website Files to the Bucket
For this example, we’ll assume you have two basic files for your static website: index.html and styles.css.
index.html:
<!DOCTYPE html>
<html lang="en">
<head>
  <meta charset="UTF-8">
  <meta name="viewport" content="width=device-width, initial-scale=1.0">
  <title>CodeZaZa - Website Development & Digital Marketing</title>
  <style>
    /* Reset */
    *{margin:0;padding:0;box-sizing:border-box;font-family:'Segoe UI',sans-serif;}

    body{line-height:1.6;background:#fff;color:#333;overflow-x:hidden;}

    header{
      background:linear-gradient(135deg,#5a00f0,#9333ea);
      color:#fff;
      text-align:center;
      padding:100px 20px 80px;
    }
    header h1{font-size:2.5rem;margin-bottom:10px;animation:fadeInDown 1.2s ease;}
    header p{font-size:1.2rem;animation:fadeInUp 1.4s ease;}
    header button{
      margin-top:20px;
      padding:12px 25px;
      border:none;
      border-radius:25px;
      background:#fff;
      color:#5a00f0;
      font-weight:bold;
      cursor:pointer;
      transition:.3s;
    }
    header button:hover{background:#eee;transform:scale(1.05);}

    nav{
      position:fixed;
      top:0;left:0;
      width:100%;
      background:#fff;
      display:flex;justify-content:center;align-items:center;
      gap:20px;
      padding:10px;
      box-shadow:0 2px 8px rgba(0,0,0,0.1);
      z-index:1000;
    }
    nav a{text-decoration:none;color:#333;font-weight:600;transition:.3s;}
    nav a:hover{color:#5a00f0;}

    section{padding:60px 20px;max-width:1200px;margin:auto;}

    .services{
      display:grid;
      grid-template-columns:repeat(auto-fit,minmax(250px,1fr));
      gap:20px;
      margin-top:30px;
    }
    .service-card{
      background:#f9f9f9;
      border-radius:15px;
      padding:30px;
      text-align:center;
      transition:.3s;
      box-shadow:0 2px 6px rgba(0,0,0,0.08);
    }
    .service-card:hover{transform:translateY(-8px);box-shadow:0 6px 14px rgba(0,0,0,0.15);}
    .service-card h3{margin:15px 0;color:#5a00f0;}

    .about{display:flex;flex-wrap:wrap;gap:20px;align-items:center;}
    .about img{max-width:450px;border-radius:15px;}
    .about div{flex:1;min-width:280px;}

    .faq details{margin:10px 0;padding:10px;border:1px solid #ddd;border-radius:8px;cursor:pointer;}
    .faq summary{font-weight:600;color:#5a00f0;}

    footer{
      background:#111;color:#eee;text-align:center;
      padding:40px 20px;
    }
    footer p{margin:5px;}

    /* Animations */
    @keyframes fadeInUp{from{opacity:0;transform:translateY(20px);}to{opacity:1;transform:translateY(0);}}
    @keyframes fadeInDown{from{opacity:0;transform:translateY(-20px);}to{opacity:1;transform:translateY(0);}}

    [data-animate]{opacity:0;transform:translateY(20px);transition:all .8s ease;}
    [data-animate].active{opacity:1;transform:translateY(0);}
  </style>
</head>
<body>

  <!-- Navbar -->
  <nav>
    <a href="#home">Home</a>
    <a href="#services">Services</a>
    <a href="#about">About</a>
    <a href="#faq">FAQ</a>
    <a href="#contact">Contact</a>
  </nav>

  <!-- Hero -->
  <header id="home">
    <h1>Website Development & Digital Marketing Company</h1>
    <p>Empowering your business with modern web solutions, SEO & cloud services.</p>
    <button>Get Report</button>
  </header>

  <!-- Services -->
  <section id="services">
    <h2 style="text-align:center;color:#5a00f0;">Our Services</h2>
    <div class="services">
      <div class="service-card" data-animate>
        <h3>DevOps</h3>
        <p>CI/CD pipelines, Infrastructure automation, Kubernetes & Docker deployments.</p>
      </div>
      <div class="service-card" data-animate>
        <h3>AI Solutions</h3>
        <p>Custom AI tools, chatbots & predictive analytics for business growth.</p>
      </div>
      <div class="service-card" data-animate>
        <h3>Python Development</h3>
        <p>Powerful backend systems, APIs, and automation scripts built in Python.</p>
      </div>
      <div class="service-card" data-animate>
        <h3>Marketing & SEO</h3>
        <p>Boost rankings, organic traffic & online visibility with smart SEO.</p>
      </div>
      <div class="service-card" data-animate>
        <h3>Social Media Ads</h3>
        <p>Data-driven ad campaigns on Facebook, Instagram, LinkedIn & more.</p>
      </div>
      <div class="service-card" data-animate>
        <h3>IT Consulting</h3>
        <p>Strategic IT guidance to align technology with your business goals.</p>
      </div>
    </div>
  </section>

  <!-- About -->
  <section id="about">
    <h2 style="text-align:center;color:#5a00f0;">About Us</h2>
    <div class="about">
      <img src="https://via.placeholder.com/450x300" alt="Team">
      <div>
        <p>We are CodeZaZa, a digital solutions company helping startups & enterprises with website development, digital marketing, DevOps, and cloud services. Our expert team blends innovation, design, and strategy to deliver scalable solutions.</p>
      </div>
    </div>
  </section>

  <!-- FAQ -->
  <section id="faq">
    <h2 style="text-align:center;color:#5a00f0;">FAQ</h2>
    <div class="faq">
      <details><summary>What services do you offer?</summary><p>We provide web development, SEO, DevOps, AI solutions, and IT consulting.</p></details>
      <details><summary>Do you provide domain & hosting?</summary><p>Yes, we help with domain registration and managed hosting solutions.</p></details>
      <details><summary>Can I get a custom website?</summary><p>Yes, we specialize in building fully customized websites tailored to your business.</p></details>
    </div>
  </section>

  <!-- Contact -->
  <section id="contact">
    <h2 style="text-align:center;color:#5a00f0;">Contact Us</h2>
    <form style="max-width:400px;margin:auto;display:flex;flex-direction:column;gap:10px;" data-animate>
      <input type="text" placeholder="Full Name" required>
      <input type="email" placeholder="Email Address" required>
      <textarea rows="4" placeholder="Message"></textarea>
      <button type="submit" style="background:#5a00f0;color:#fff;border:none;padding:12px;border-radius:8px;cursor:pointer;">Submit</button>
    </form>
  </section>

  <!-- Footer -->
  <footer>
    <p>© 2025 CodeZaZa. All Rights Reserved.</p>
    <p>Follow us: Facebook | Twitter | LinkedIn</p>
  </footer>

  <script>
    // Scroll animation
    const elements=document.querySelectorAll('[data-animate]');
    const observer=new IntersectionObserver(entries=>{
      entries.forEach(entry=>{
        if(entry.isIntersecting){
          entry.target.classList.add('active');
        }
      });
    },{threshold:0.2});
    elements.forEach(el=>observer.observe(el));
  </script>
</body>
</html>
styles.css:
body {
    font-family: Arial, sans-serif;
    text-align: center;
    background-color: #f4f4f4;
    margin-top: 50px;
}
h1 {
    color: #333;
}
p {
    color: #666;
}
Uploading the Files:
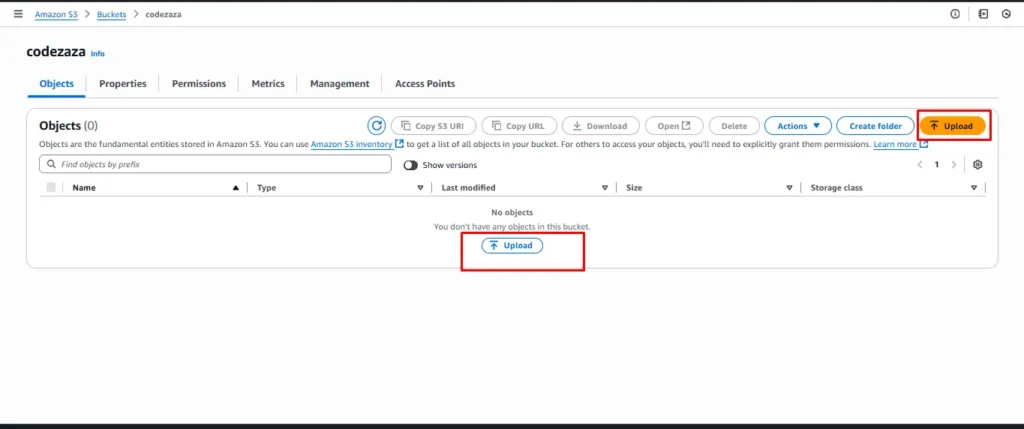
- Navigate to your S3 bucket in the AWS Console.
- Click the “Upload” button.
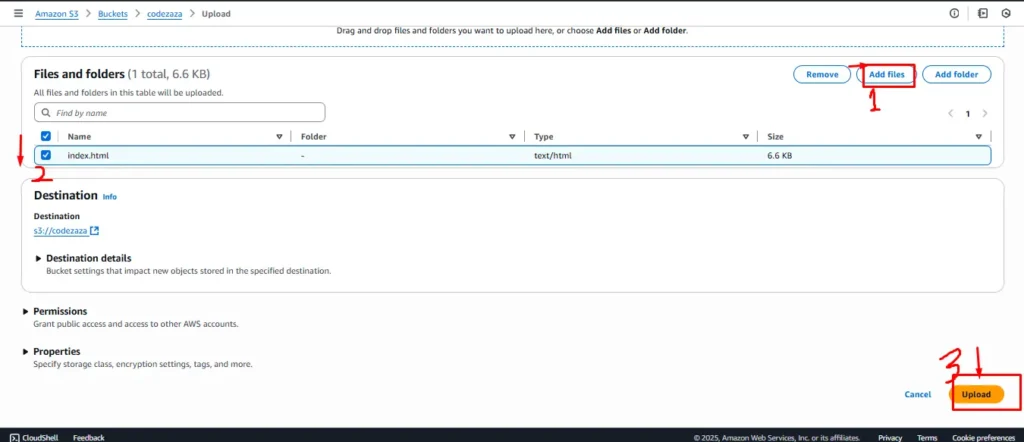
3. Drag and drop or browse to select both index.html and styles.css.
4. Click “Upload”.
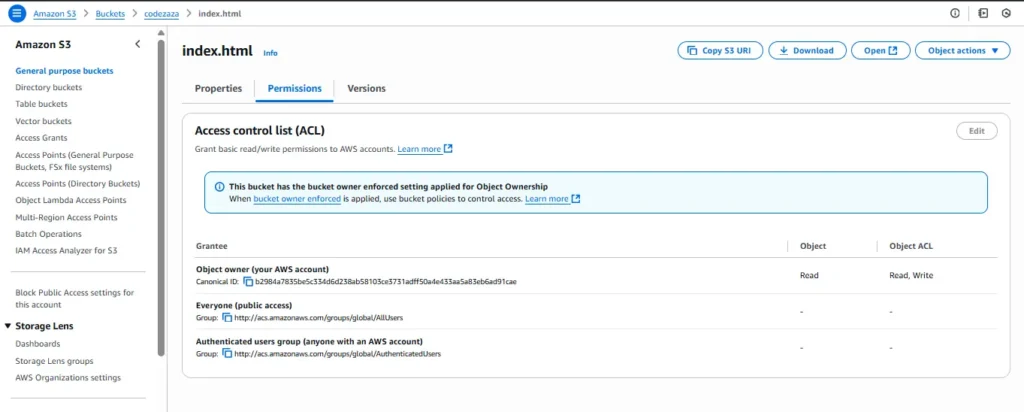
Set File Permissions:
To ensure that the public can access your website, you need to set the correct permissions.
- Click on the file you’ve uploaded.
- Under the “Permissions” tab, click on “Edit”.
- Under “Public access”, check the “Everyone” box for “Read object” permission.
- Save the changes. Repeat for all files in your website.
Steps to Grant Public Read Access with Bucket Policies:
- Navigate to your S3 bucket in the AWS Console.
- Click on the “Permissions” tab.
- Go to “Bucket Policy”.
- If you don’t already have a policy granting public read access, you can use the following policy. Replace
your-bucket-namewith the name of your bucket:
{
    "Version": "2012-10-17",
    "Statement": [
        {
            "Sid": "PublicReadGetObject",
            "Effect": "Allow",
            "Principal": "*",
            "Action": "s3:GetObject",
            "Resource": "arn:aws:s3:::nlp.group/*"
        }
    ]
}
4. Accessing and Testing Your Static Website
- Navigate back to the “Properties” tab of your bucket.
- Click on “Static website hosting”.
- You will see an “Endpoint” URL. This is the URL of your static website.
- Click on the URL or paste it into a browser to access your website.

5. Advantages of static website hosting
Low Cost – Hosting a static website on S3 is very affordable because you only pay for the storage you use and the data transferred. There are no server costs since no backend processing is required.
High Durability & Availability – Amazon S3 provides 99.999999999% (11 nines) durability and high availability, ensuring your website content is always safe and accessible.
Scalability – Your static website can automatically handle any amount of traffic, whether it’s 10 users or 1 million, without additional setup or infrastructure changes.
Global Reach with CloudFront – By integrating Amazon S3 with Amazon CloudFront (CDN), your website can be distributed globally, reducing latency and improving performance for users worldwide.
Security & Access Control – S3 offers fine-grained permissions using IAM policies and bucket policies, allowing you to control who can access your website data. Additionally, HTTPS can be enabled with CloudFront and ACM (AWS Certificate Manager).
Easy Custom Domain Setup – With Amazon Route 53, you can map your own custom domain (e.g., www.mywebsite.com) to your S3 bucket for a professional look.
Simplified Management – S3 requires no server maintenance, software updates, or infrastructure management, which makes hosting straightforward and developer-friendly.
5. Conclusion
Congratulations! You’ve successfully set up a simple static website using Amazon S3. This is just the beginning. You can expand your website, integrate it with Amazon CloudFront for faster content delivery, or use Route 53 to route traffic to your custom domain. The possibilities with AWS are vast, and your static website on S3 is a testament to its simplicity and power.
