
In Jenkins, a freestyle project is the simplest type of job you can create. It helps you build and run any kind of application without writing any code or using any scripting language.
You can easily set it up using Jenkins’ web interface (console) — just by clicking and filling out options. This makes it beginner-friendly and saves a lot of time and effort because you don’t have to write any complex scripts.
What is Freestyle Project
A Freestyle Project in Jenkins is the most basic and easy-to-use type of job that allows you to automate the building, testing, and deployment of applications without writing any code or scripts. It provides a simple graphical interface where you can configure everything by clicking and filling in options, making it ideal for beginners or teams who want to get started quickly with Continuous Integration (CI). You can easily connect it to your source code repository, such as GitHub, define build triggers, and set up build steps like compiling code, running tests, or deploying applications. Overall, a Freestyle Project offers a straightforward and flexible way to automate repetitive tasks and improve development efficiency.
steps to create a freestyle project in Jenkins.
Step 1: Access Jenkins and Log In
Open your browser and access the Jenkins URL (e.g., http://localhost:8080). Log in with your Jenkins credentials (username and password) that you set up during the installation process
.webp)
Step 2: Create a New Freestyle Project
On the Jenkins dashboard, click on “New Item” to create a new project.
- In the pop-up window, enter the name of your project.
- Select “Freestyle project” from the options.
- Click OK to proceed.
.webp)
Step 3: Configure the Project
After selecting Freestyle project, a configuration page will open where you can define all the settings for your project. Here, you will specify the source code repository, build tools, and other necessary configurations.
Provide details such as:
- Source Code Management: The repository URL where Jenkins will fetch the source code.
- Build Triggers: Specify when Jenkins should automatically trigger the build.
- Build Environment: Define the environment required to build and deploy the application.
.webp)
Step 4: Configure the GitHub Repository
In this step, you will configure Jenkins to pull the source code from your GitHub repository.
- In the Source Code Management section, select Git.
- Paste your GitHub repository URL in the Repository URL field.
- Click on the Add Credentials link next to the Credentials field to link your GitHub account.
.webp)
Step 5: Add Credentials for GitHub
- Click the +Add button to open the credentials pop-up.
- In the pop-up window, select “Username with password” for the Kind field.
- Enter your GitHub username and the SSH key in the respective fields. To get the SSH key, go to your GitHub account, generate an SSH key, and use that in the password field.
- Click OK to save your credentials.
.webp)
Step 6: Select Git Branch
In the Branches to build section, specify the branch you want Jenkins to clone.
.webp)
Step 7: Configure Maven Build
You need to configure the Maven build step.
- Scroll to the Build section and select “Invoke top-level Maven targets”.
- Under Maven Version, select the version of Maven you have configured in Jenkins (e.g.,
Maven 3.8.6). - In the Goals field, enter the Maven command to build your project:
clean package
Note: Do not include mvn here; Jenkins will automatically run Maven for you.
.webp)
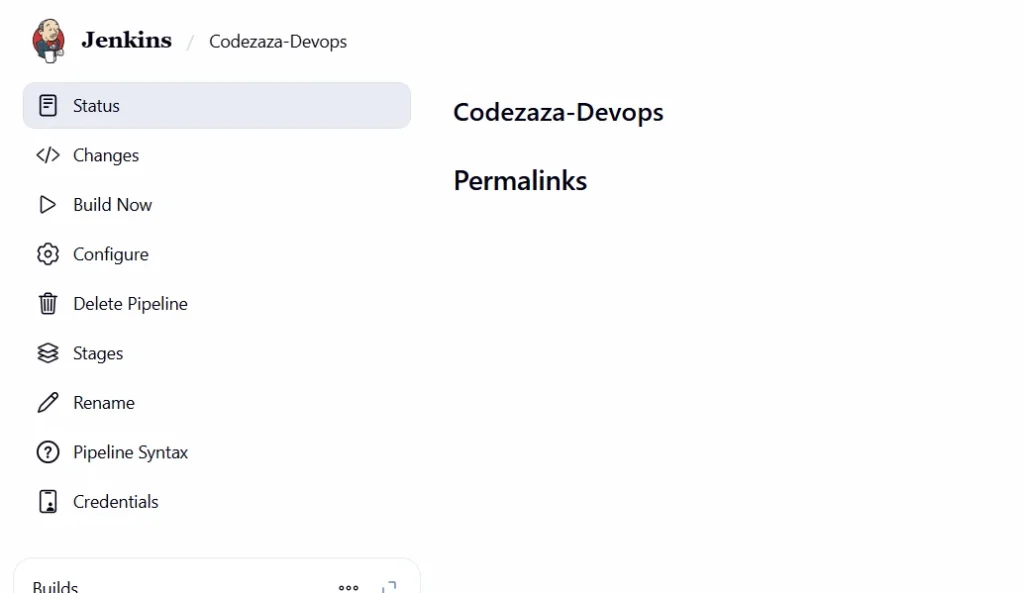
Step 8: Save the Configuration
After configuring all the necessary details, click on the Save button. You will be redirected to the build page of your project. On this page, click on the Build Now option to trigger the build.
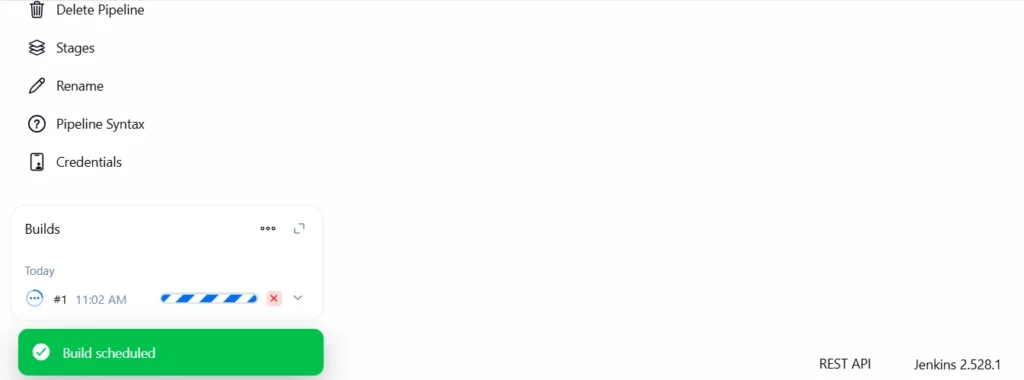
Step 9: Monitor the Build
Once the build starts, Jenkins will execute the build process.
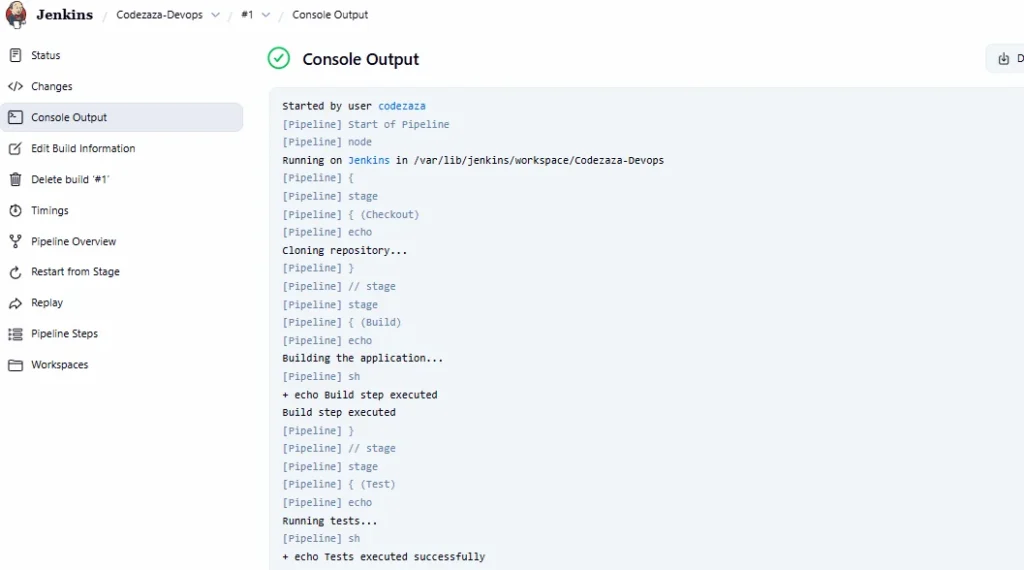
- Click on the Job that is currently running. This will open the Console Output where you can monitor the status of the build.
- In the Console Output, you will see logs related to the build process, including whether the build was successful or failed.
Step 10: Review the Build Status
- Scroll down in the Console Output to check the status of the build.
- If the build is successful, you will see a message indicating that the job has succeeded.
- If there are any issues or errors, the console will display detailed logs, allowing you to debug and fix the problems accordingly.
Benefits of Freestyle Projects in Jenkins
- Easy to Use (No Coding Required):
Freestyle projects are beginner-friendly because you can configure everything using Jenkins’ web interface — no scripting or coding skills are needed. - Quick Setup:
You can create and configure a freestyle project in just a few minutes. This makes it ideal for simple automation tasks or small projects. - Flexible and Customizable:
Freestyle projects support different build tools like Maven, Gradle, and shell scripts, allowing you to customize your build process easily. - Supports Multiple Source Code Repositories:
You can connect Jenkins with Git, GitHub, Bitbucket, or other SCM tools to automatically fetch your source code. - Automated Build Triggers:
You can set up automatic triggers — for example, start a build whenever someone pushes code to GitHub — saving manual effort. - Easy Integration with Plugins:
Jenkins offers thousands of plugins that can be easily integrated into freestyle projects to add extra features like notifications, test reports, and deployment steps. - Real-Time Monitoring:
You can view live console logs and track build progress directly in the Jenkins dashboard. - Ideal for Beginners and Small Teams:
Since it’s simple to configure and maintain, freestyle projects are perfect for learners or small teams starting with CI/CD automation.
Conclusion
Freestyle projects in Jenkins are the easiest and quickest way to start automating your software builds and deployments. They don’t require any coding or scripting skills, making them perfect for beginners or small teams who want to understand the basics of Continuous Integration (CI).
With a simple point-and-click setup, you can connect your source code, configure build tools like Maven, and automate your entire workflow within minutes. As you gain more experience, you can later move to advanced Jenkins pipelines for greater flexibility and control.
In short, Jenkins Freestyle Projects are a great starting point to learn automation, save time, and improve productivity in your development process.
