Introduction
Modern DevOps practices demand infrastructure that is reproducible, scalable, and fully automated. In this comprehensive guide, I will walk you through the complete journey of building a production-ready CI/CD pipeline that provisions AWS infrastructure using Terraform, deploys a Directus application with Docker, and orchestrates everything through GitLab CI/CD. This project represents a real-world implementation of Infrastructure as Code principles combined with modern application deployment strategies.
The solution encompasses four critical days of development, from initial infrastructure design to pipeline stabilization. Each phase introduces new challenges and solutions that mirror the complexities encountered in professional DevOps environments. By the end of this guide, you will understand how to create a fully automated deployment pipeline that handles everything from virtual machine provisioning to application deployment and infrastructure cleanup.
Day 1: Laying the Foundation with Terraform Infrastructure
The first day focuses on establishing a solid infrastructure foundation using Terraform. The primary goal involves designing a modular, reusable infrastructure layer that can be provisioned consistently across different environments. This approach ensures that the infrastructure remains version-controlled, auditable, and completely reproducible.
Modular Project Structure
A well-organized Terraform project forms the backbone of any successful infrastructure implementation. Instead of placing all resources in a single monolithic file, the project adopts a modular structure that separates concerns and promotes reusability. The root module acts as an orchestrator, while dedicated modules handle specific resource types such as EC2 instances and security groups.
The project structure follows this organization:
terraform/
├── main.tf
├── variables.tf
├── outputs.tf
├── provider.tf
├── data.tf
├── modules/
│   ├── ec2/
│   │   ├── main.tf
│   │   ├── variables.tf
│   │   ├── outputs.tf
│   │   └── user_data.sh
│   └── security_group/
│       ├── main.tf
│       ├── variables.tf
│       └── outputs.tf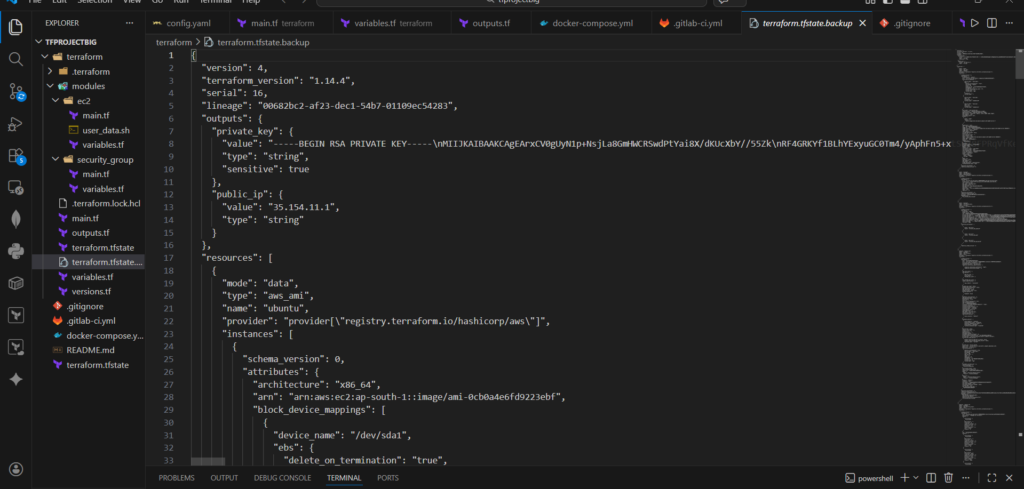
Provider Configuration and Version Management
The Terraform configuration begins by defining required providers and enforcing specific version constraints. This practice prevents compatibility issues and ensures consistent behavior across all team members and automation environments.
terraform {
  required_version = ">= 1.0"
  required_providers {
    aws = {
      source  = "hashicorp/aws"
      version = ">= 5.0"
    }
    tls = {
      source  = "hashicorp/tls"
      version = ">= 4.0"
    }
  }
}

provider "aws" {
  region = var.region
}
The provider configuration uses a variable-driven approach, allowing the region to change without modifying the core configuration. This flexibility proves essential when managing multiple environments or deploying across different AWS regions.
Dynamic AMI Selection
Hardcoding AMI IDs leads to maintenance nightmares and potential security vulnerabilities. The solution employs a data source to dynamically fetch the latest Ubuntu 22.04 LTS image. This approach ensures the infrastructure always uses an up-to-date operating system with the latest security patches.
data "aws_ami" "ubuntu" {
  most_recent = true
  owners      = ["099720109477"]

  filter {
    name   = "name"
    values = ["ubuntu/images/hvm-ssd/ubuntu-jammy-22.04-amd64-server-*"]
  }
}
Automated SSH Key Generation
Manual SSH key generation introduces unnecessary friction and breaks the automation principle. The Terraform configuration uses the TLS provider to generate RSA key pairs automatically during infrastructure provisioning.
resource "tls_private_key" "ssh_key" {
  algorithm = "RSA"
  rsa_bits  = 4096
}

resource "aws_key_pair" "generated_key" {
  key_name   = var.key_name
  public_key = tls_private_key.ssh_key.public_key_openssh
}
This approach eliminates manual steps entirely. The generated private key becomes available as a Terraform output, ready for use by subsequent pipeline stages or for establishing SSH connections during troubleshooting.
Security Group Module
Network security rules deserve their own dedicated module to improve reusability and maintain clear separation of concerns. The security group module defines ingress rules for SSH, HTTP, and the Directus application port, while allowing all outbound traffic.
resource "aws_security_group" "this" {
  name        = "${var.project_name}-sg"
  description = "Security group for ${var.project_name}"

  ingress {
    from_port   = 22
    to_port     = 22
    protocol    = "tcp"
    cidr_blocks = ["0.0.0.0/0"]
    description = "SSH access"
  }

  ingress {
    from_port   = 80
    to_port     = 80
    protocol    = "tcp"
    cidr_blocks = ["0.0.0.0/0"]
    description = "HTTP access"
  }

  ingress {
    from_port   = 8055
    to_port     = 8055
    protocol    = "tcp"
    cidr_blocks = ["0.0.0.0/0"]
    description = "Directus application"
  }

  egress {
    from_port   = 0
    to_port     = 0
    protocol    = "-1"
    cidr_blocks = ["0.0.0.0/0"]
  }
}
The module exposes the security group ID through an output, enabling the EC2 module to reference it without creating tight coupling between the modules.
output "security_group_id" {
  value = aws_security_group.this.id
}
EC2 Module with User Data Integration
The EC2 module handles instance creation and initial configuration. It accepts parameters for AMI ID, instance type, key name, and security group ID, making it adaptable to different deployment scenarios.
resource "aws_instance" "this" {
  ami                         = var.ami_id
  instance_type               = var.instance_type
  key_name                    = var.key_name
  vpc_security_group_ids      = [var.security_group_id]
  associate_public_ip_address = true

  user_data = file("${path.module}/user_data.sh")

  tags = {
    Name    = "${var.project_name}-server"
    Project = var.project_name
  }
}
The user data script resides in a separate file, improving readability and maintainability. This script installs Docker and Docker Compose during the initial instance boot, preparing the server for application deployment.
#!/bin/bash
apt update -y
apt install -y docker.io docker-compose

systemctl start docker
systemctl enable docker

usermod -aG docker ubuntu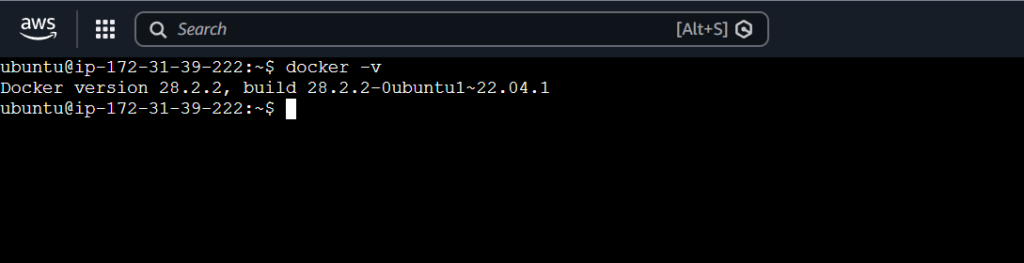
Root Module Orchestration
The root module brings all components together, creating the SSH key, fetching the latest AMI, and initializing the security group and EC2 modules with appropriate values.
module "sg" {
  source       = "./modules/security_group"
  project_name = var.project_name
}

module "ec2" {
  source           = "./modules/ec2"
  ami_id           = data.aws_ami.ubuntu.id
  instance_type    = var.instance_type
  key_name         = aws_key_pair.generated_key.key_name
  security_group_id = module.sg.security_group_id
  project_name     = var.project_name
}
Outputs for Pipeline Integration
Terraform outputs expose critical information to the CI/CD pipeline. The public IP address enables the pipeline to connect to the server, while the private key provides secure access for deployment operations.
output "public_ip" {
  value = module.ec2.public_ip
}

output "private_key" {
  value     = tls_private_key.ssh_key.private_key_pem
  sensitive = true
}
SSH Verification and Troubleshooting
After provisioning the infrastructure, verifying SSH access confirms that the key generation and security group configuration work correctly. On Windows systems, proper key handling requires attention to encoding and permissions.
Exporting the private key with ASCII encoding prevents corruption issues that commonly occur with PowerShell redirection:
(terraform output -raw private_key) | Out-File -Encoding ascii key.pemSSH requires strict permissions on private key files. The following commands remove inherited permissions and grant read access only to the current user:
icacls key.pem /inheritance:r
icacls key.pem /grant:r "${env:USERNAME}:R"
With the key properly formatted and secured, establishing the SSH connection confirms successful infrastructure provisioning:
ssh -i key.pem ubuntu@<public-ip>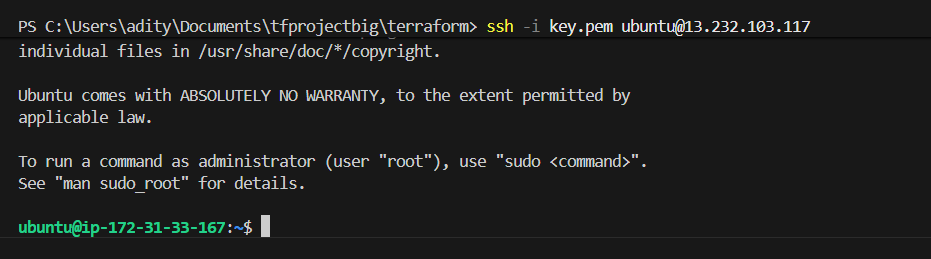
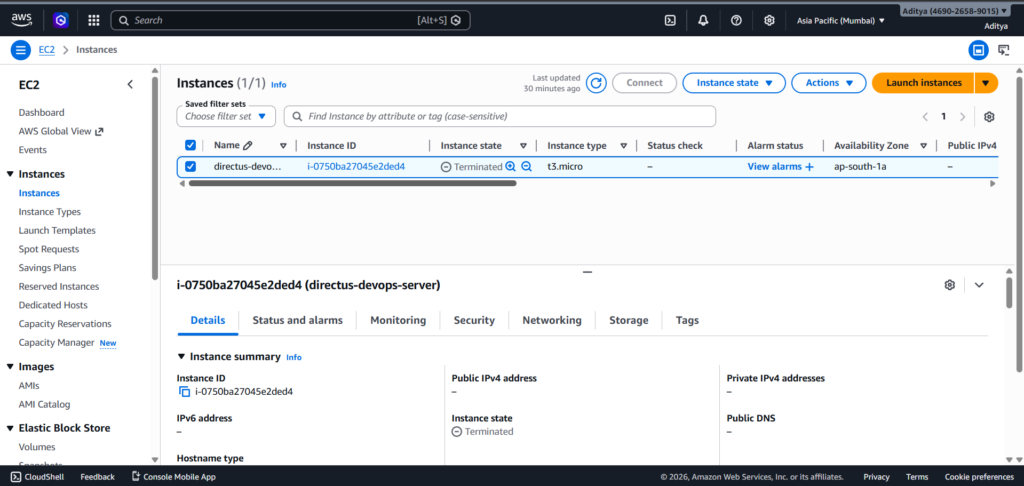
Infrastructure Validation and Cleanup
Testing the complete lifecycle confirms that the infrastructure follows Infrastructure as Code principles. After verification, destroying the resources ensures the environment can be recreated from scratch:
terraform destroyRunning terraform apply again after destruction should recreate the identical environment, validating the reproducibility of the configuration.
Day 2 Part 1: Application Deployment Design with Docker
The second day shifts focus from infrastructure to application deployment. The goal involves designing a containerized setup for Directus that integrates seamlessly with the CI/CD pipeline and maintains security best practices.
Docker Compose Architecture
The application architecture consists of two containers communicating through Docker’s internal network. PostgreSQL serves as the database backend, while Directus provides the headless CMS functionality.
services:
  database:
    image: postgres:13
    container_name: directus-db
    restart: always
    environment:
      POSTGRES_DB: directus
      POSTGRES_USER: directus
      POSTGRES_PASSWORD: ${DB_PASSWORD}
    volumes:
      - postgres_data:/var/lib/postgresql/data

  directus:
    image: directus/directus:latest
    container_name: directus-app
    restart: always
    ports:
      - "8055:8055"
    depends_on:
      - database
    environment:
      KEY: ${DIRECTUS_SECRET}
      DB_CLIENT: pg
      DB_HOST: database
      DB_PORT: 5432
      DB_DATABASE: directus
      DB_USER: directus
      DB_PASSWORD: ${DB_PASSWORD}
      ADMIN_EMAIL: ${ADMIN_EMAIL}
      ADMIN_PASSWORD: ${ADMIN_PASSWORD}
    volumes:
      - uploads:/directus/uploads

volumes:
  postgres_data:
  uploads:
Environment Variable Strategy
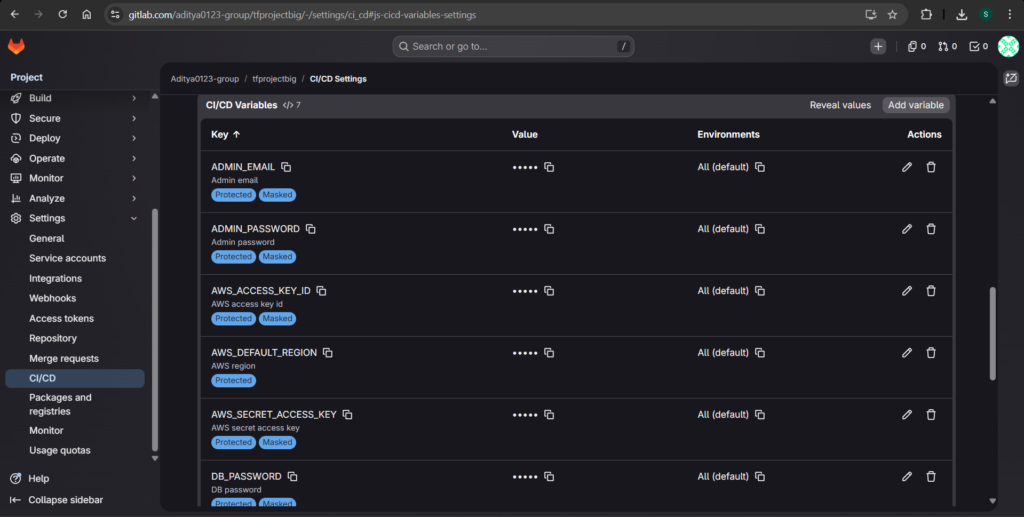
Sensitive credentials never appear in the Docker Compose file. Instead, the configuration references environment variables using the ${VARIABLE_NAME} syntax. This approach ensures that secrets remain outside version control and can be injected dynamically during pipeline execution.
The required environment variables include:
ADMIN_EMAIL: The administrator email for DirectusADMIN_PASSWORD: The administrator passwordDB_PASSWORD: The PostgreSQL database passwordDIRECTUS_SECRET: A secret key used for encryption
CI/CD Compatibility Design
The pipeline will generate the .env file dynamically on the server using variables stored in GitLab. This approach ensures sensitive information never commits to the repository:
echo "ADMIN_EMAIL=${ADMIN_EMAIL}" > .env
echo "ADMIN_PASSWORD=${ADMIN_PASSWORD}" >> .env
echo "DB_PASSWORD=${DB_PASSWORD}" >> .env
echo "DIRECTUS_SECRET=${DIRECTUS_SECRET}" >> .env
Volume Configuration for Data Persistence
Two Docker volumes ensure data persistence across container restarts and recreations. The postgres_data volume stores database files, while the uploads volume maintains Directus file uploads. This configuration prevents data loss during application updates or maintenance operations.
Port Configuration and Accessibility
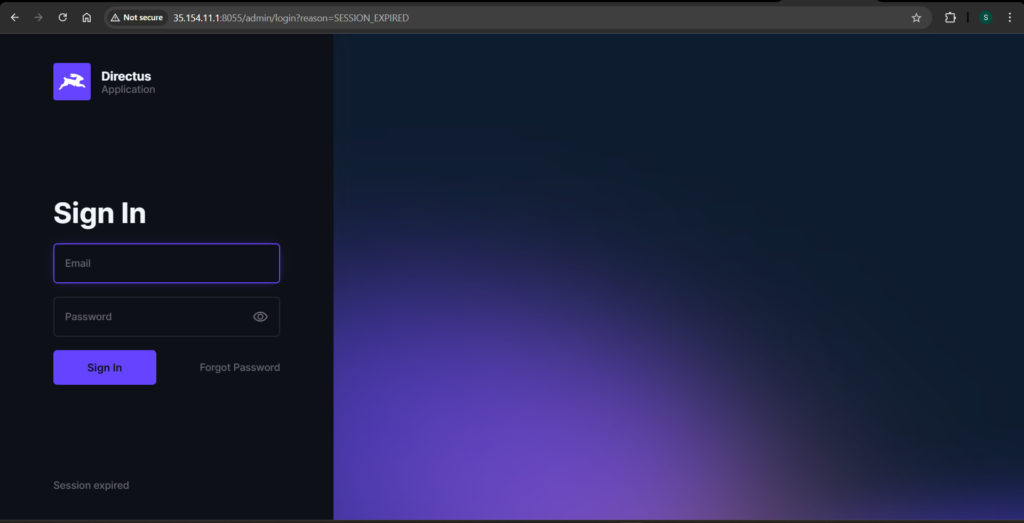
The Directus service maps port 8055 on the host to port 8055 inside the container, making the application accessible through the server’s public IP address. Users can access the Directus interface at http://<server-ip>:8055.
Validation and Testing
Validating the Docker Compose configuration locally catches syntax errors before pipeline execution:
docker compose configThis command resolves environment variables and validates the configuration structure. Warnings about missing environment variables are expected when running locally, as the .env file does not exist in the development environment.
Day 2 Part 2: Deployment Simulation and Validation
Before automating the deployment process, simulating the manual steps confirms that the configuration works correctly and helps identify potential issues.
Infrastructure Recreation
Recreating the infrastructure using Terraform ensures the environment matches what the pipeline will provision:
terraform applyThis step confirms the infrastructure remains reproducible and consistent across runs.
Establishing SSH Connection
Connecting to the EC2 instance using the Terraform-generated key verifies network connectivity and proper key management:
ssh -i key.pem ubuntu@<public-ip>Preparing the Server Environment
Creating a dedicated directory on the server maintains organization and mirrors how the pipeline will operate:
mkdir directus-app
cd directus-app
Transferring Deployment Files
Copying the Docker Compose file to the server simulates how the pipeline will transfer artifacts:
scp -i key.pem docker-compose.yml ubuntu@<public-ip>:/home/ubuntu/directus-app/Environment File Creation
Creating the .env file manually replicates the variable injection process that will occur in the pipeline:
nano .envThe file contains the required environment variables:
ADMIN_EMAIL=admin@example.com
ADMIN_PASSWORD=admin123
DB_PASSWORD=admin123
DIRECTUS_SECRET=mysecretkey
Application Deployment
Starting the application with Docker Compose launches both containers in detached mode:
docker-compose up -d
Verification Steps
Verifying running containers confirms successful deployment:
docker psAccessing the application through a web browser validates public accessibility:
curl http://localhost:8055The health check should return an HTML response, confirming that Directus is running correctly.
Handling Docker Compose Version Differences
During the simulation, encountering the error unknown shorthand flag: ‘d’ in -d indicated the presence of Docker Compose v1. The solution involved using the traditional docker-compose command instead of the newer docker compose syntax. This observation informs the pipeline design to accommodate both versions.
Day 3: GitLab CI/CD Pipeline Implementation
Day 3 marks the transition from manual operations to full automation. The GitLab CI/CD pipeline orchestrates the entire workflow from code validation to infrastructure provisioning and application deployment.
Pipeline Structure and Stages
The pipeline follows a logical sequence of five stages, each building on the success of the previous stage:
stages:
  - validate
  - plan
  - provision
  - deploy
  - destroy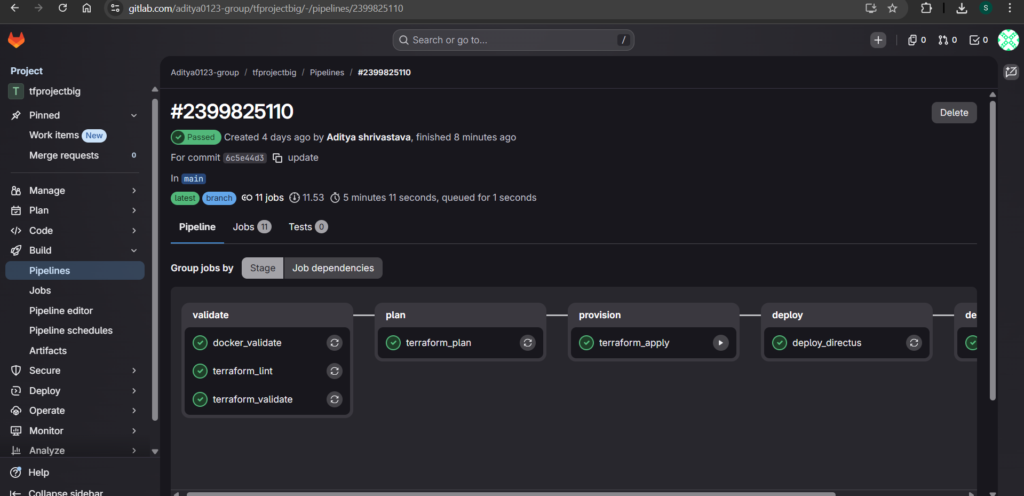
This structure ensures that errors are caught early, changes are reviewed before application, and the deployment proceeds only when all prerequisites are satisfied. The destroy stage appears as the final stage, enabling complete infrastructure lifecycle management.
Validation Stage
The validation stage ensures all configuration files are syntactically correct and follow best practices before any resource provisioning occurs.
Terraform Validation
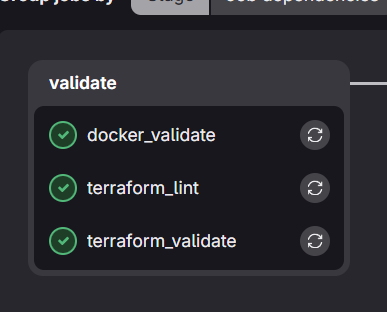
terraform_validate:
  stage: validate
  image:
    name: hashicorp/terraform:latest
    entrypoint: [""]
  script:
    - cd terraform
    - terraform init
    - terraform validate
    - terraform fmt -check
Terraform Linting
terraform_lint:
  stage: validate
  image:
    name: ghcr.io/terraform-linters/tflint:latest
    entrypoint: [""]
  script:
    - tflint --chdir=terraform
Docker Compose Validation
docker_validate:
  stage: validate
  image: docker:latest
  services:
    - docker:dind
  script:
    - docker compose version
    - docker compose -f docker-compose.yml config
Plan Stage
The plan stage generates a Terraform execution plan, providing visibility into the infrastructure changes before application. This step is essential for reviewing what resources will be created, modified, or destroyed.
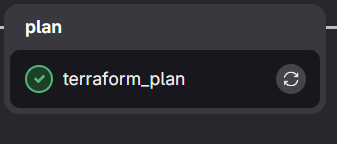
terraform_plan:
  stage: plan
  image:
    name: hashicorp/terraform:latest
    entrypoint: [""]
  script:
    - cd terraform
    - terraform init
    - terraform plan -out=tfplan
  artifacts:
    paths:
      - terraform/tfplan
This stage saves the plan as an artifact, enabling future stages to reference it if needed.
Provision Stage
The provision stage applies the Terraform configuration, creating the infrastructure resources. This stage requires manual trigger to prevent accidental infrastructure changes.
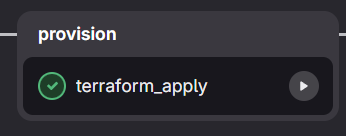
terraform_apply:
  stage: provision
  image:
    name: hashicorp/terraform:latest
    entrypoint: [""]
  script:
    - cd terraform
    - terraform init
    - terraform apply -auto-approve
    - terraform output -raw public_ip > server_ip.txt
    - terraform output -raw private_key > ssh_key.pem
    - chmod 600 ssh_key.pem
    - mv server_ip.txt ../
    - mv ssh_key.pem ../
  artifacts:
    paths:
      - server_ip.txt
      - ssh_key.pem
      - terraform/terraform.tfstate
      - terraform/terraform.tfstate.backup
    expire_in: 1 week
  when: manual
The artifacts include the server IP address, SSH private key, and Terraform state files. The state files are particularly important for the destroy stage, which needs to know exactly what resources were created. The one-week expiration period provides ample time for testing while preventing indefinite artifact accumulation.
Deploy Stage Implementation
The deploy stage represents the most complex part of the pipeline. It must handle SSH connections, file transfers, environment variable injection, and Docker operations on a remote server.
The initial implementation attempts to handle all these tasks in a single job:
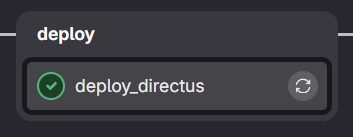
deploy_directus:
  stage: deploy
  image: alpine:latest
  before_script:
    - apk add --no-cache openssh-client bash curl
  script:
    - SERVER_IP=$(cat server_ip.txt)
    - chmod 600 ssh_key.pem
    - mkdir -p ~/.ssh
    - echo -e "Host *\n\tStrictHostKeyChecking no\n" > ~/.ssh/config
    - scp -i ssh_key.pem docker-compose.yml ubuntu@$SERVER_IP:~
    - |
      ssh -i ssh_key.pem ubuntu@$SERVER_IP "
        echo ADMIN_EMAIL=${ADMIN_EMAIL} > .env &&
        echo ADMIN_PASSWORD=${ADMIN_PASSWORD} >> .env &&
        echo DB_PASSWORD=${DB_PASSWORD} >> .env &&
        echo SECRET=${DIRECTUS_SECRET} >> .env &&
        sudo docker compose up -d
      "
However, this implementation encountered several issues that required systematic debugging and refinement.
Day 4: Pipeline Stabilization and Final Deployment
The final day focuses on resolving deployment issues and creating a stable, reliable pipeline that consistently delivers the application.
Ensuring Docker Service Availability
Even though Docker installs through the user_data script, the service may not be ready when the pipeline attempts to run Docker commands. The solution involves explicitly starting and enabling the Docker service during deployment:
sudo systemctl start docker
sudo systemctl enable docker
Handling Docker Socket Readiness
The Docker daemon may require additional time to initialize after service start. A wait mechanism ensures the pipeline only proceeds when the Docker socket becomes available:
until [ -S /var/run/docker.sock ]; do
  echo "Waiting for Docker socket..."
  sleep 3
done
Dynamic Docker Compose Installation
Relying on the user_data script for Docker Compose installation introduces timing and network reliability issues. Moving the installation to the deployment stage ensures it happens exactly when needed:
if ! command -v docker-compose > /dev/null; then
  curl -L "https://github.com/docker/compose/releases/latest/download/docker-compose-$(uname -s)-$(uname -m)" -o docker-compose
  chmod +x docker-compose
  sudo mv docker-compose /usr/local/bin/
fi
Resolving Docker Permission Issues
SSH sessions do not automatically inherit updated group memberships, even when the ubuntu user belongs to the docker group. Using sudo for Docker commands eliminates permission-related failures:
sudo docker-compose up -dCorrecting Environment Variable Mapping
Directus requires a specific environment variable name for the secret key. Using the correct variable name ensures proper application initialization:
echo "DIRECTUS_SECRET=${DIRECTUS_SECRET}" >> .envSuccessful Deployment Outcome
After implementing these fixes, the deployment completes successfully. Verifying container status confirms all services are running:
sudo docker ps -aThe health check validates application accessibility:
curl http://localhost:8055A successful HTML response indicates Directus is operational and ready to serve requests.
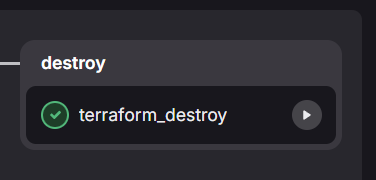
Terraform Destroy Implementation
Complete infrastructure lifecycle management requires the ability to tear down resources when they are no longer needed. The destroy stage adds this capability while maintaining state consistency and incorporating safety controls.
State Management Challenge
GitLab CI runs each job in an isolated container with no persistence between executions. The Terraform state file created during provisioning disappears when the terraform_apply job completes. Without this state file, a destroy operation has no knowledge of what resources to remove.
Artifact-Based State Persistence
The solution involves persisting state files as pipeline artifacts. The terraform_apply job saves both the primary state file and its backup, as shown in the provision stage configuration. These artifacts become available to subsequent jobs that declare a dependency.
State Restoration Through Job Dependencies
The terraform_destroy job uses the needs directive with artifacts: true to download the state files before execution:
terraform_destroy:
  stage: destroy
  image:
    name: hashicorp/terraform:latest
    entrypoint: [""]
  needs:
    - job: terraform_apply
      artifacts: true
  variables:
    TF_IN_AUTOMATION: "true"
  script:
    - cd terraform
    - terraform init
    - echo "== Current resources in state =="
    - terraform state list || echo "No resources found in state"
    - echo ""
    - echo "== Plan for destruction =="
    - terraform plan -destroy
    - echo ""
    - echo "== Proceeding with destroy =="
    - terraform destroy -auto-approve
    - echo ""
    - echo "== Verification - remaining resources =="
    - terraform state list || echo "State is empty, all resources destroyed"
  when: manual
Safety Controls
Manual triggering serves as the primary safety control for infrastructure destruction. The when: manual directive prevents automatic destruction and requires explicit operator action through the GitLab CI interface.
The TF_IN_AUTOMATION variable optimizes Terraform’s behavior for CI/CD environments, adjusting output formatting and suppressing interactive prompts that would otherwise block pipeline execution.
Execution Flow with Visibility
The destroy job provides comprehensive visibility at each step. It begins by listing resources in the state, giving operators immediate confirmation of what exists. Next, it generates and displays the destruction plan, showing exactly which resources will be affected. After the plan review, it executes the destruction with the -auto-approve flag, which is appropriate because the manual trigger already provides operator approval. Finally, it verifies all resources are removed, confirming the operation’s success.
Pipeline Integration
The destroy stage appears as the final stage in the pipeline, positioned after deploy to ensure the application has been fully tested before infrastructure teardown becomes available. The destroy job remains pending until manually triggered, allowing operators to run the provisioning and deployment pipeline multiple times before initiating destruction when the infrastructure is no longer needed.
Conclusion
This comprehensive implementation demonstrates the complete DevOps lifecycle from infrastructure provisioning to application deployment and cleanup. The modular Terraform design ensures infrastructure remains reproducible and maintainable. The containerized application architecture with secure environment variable management aligns with security best practices. The GitLab CI/CD pipeline automates every step across five stages—validate, plan, provision, deploy, and destroy—creating a truly production-ready system.
The challenges encountered throughout this journey mirror real-world DevOps scenarios. Docker service readiness issues, permission problems, and state management complexities all required systematic debugging and refinement. Each resolved issue contributed to a more robust and reliable pipeline.
The final solution achieves complete automation of the infrastructure and application lifecycle. With a single GitLab pipeline, teams can validate configurations, review infrastructure changes, provision AWS resources, deploy Directus with PostgreSQL, and destroy everything when no longer needed. This level of automation reduces manual effort, eliminates human error, and enables consistent, repeatable deployments across any environment.