In Kubernetes, as clusters grow and host multiple teams, projects, or environments, managing resources efficiently becomes crucial. Kubernetes Namespaces provide a way to partition a cluster into logically isolated units, making it easier to organize, control, and monitor resources. By using Namespaces, administrators can enforce policies, control access, and avoid conflicts between teams or applications.
What is a namespace in Kubernetes?
Kubernetes namespaces provide a way to partition and organize resources within a Kubernetes cluster. They allow the separation and logical organization of groups of resources within a cluster, making cluster management more streamlined. Namespaces can be created using the command line tool kubectl or a YAML configuration file.
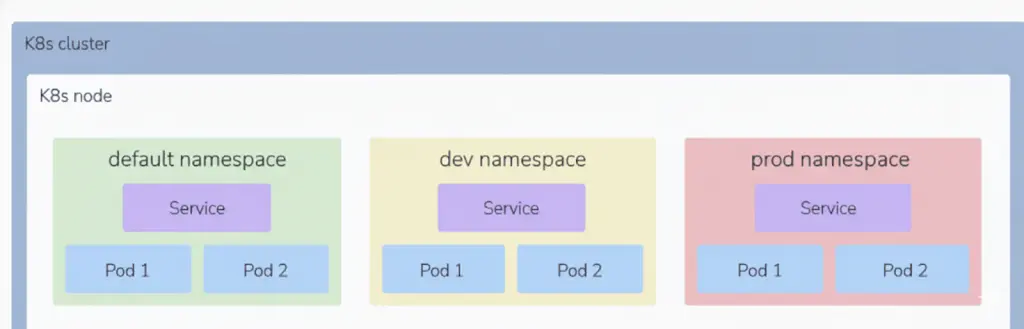
Namespaces can be used for logical groupings, for example, to denote multiple environments like dev, qa, or prod, or for grouping objects that make up an application. Commonly a combination of both the above examples is used. If an application is called blog, then it could be segmented using namespaces blog-dev, blog-qa, and blog-prod.
If a resource is namespaced, that means it cannot be created without a namespace.
Default namespace types in Kubernetes
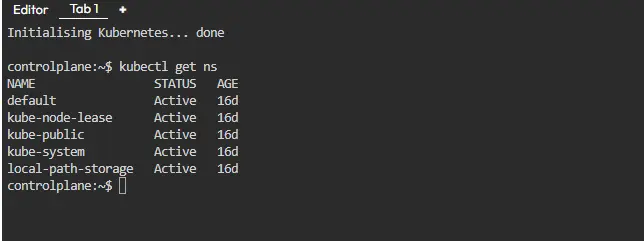
By default, when you are creating a new Kubernetes cluster using a managed service, the following types of namespaces are created:
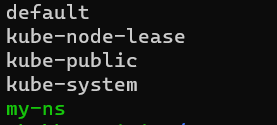
kubectl get namespaces
default – the default Kubernetes namespace is used for resources that don’t have a specific namespace specified when created
kube-node-lease – helps determine the availability of the nodes
kube-public – used for resources that need to be readable by all users
kube-system – contains the system processes such as DNS, dashboard, logging, and monitoring, among others
Before learning about the 4 default Namespaces, let’s first briefly discuss kubernetes dashboard namespace, which is a Namespace that comes built-in with Minikube.
Kubernetes Dashboard Namespace
The kubernetes-dashboard namespace comes pre-installed with Minikube. It only appears in Minikube installations and does not exist in standard Kubernetes clusters. Therefore, you will not see this namespace in typical cluster setups.
1. kube-system
The kube-system namespace contains objects created by the Kubernetes system. It hosts core components, such as master node processes and system services like kubectl. Since this namespace serves only system purposes, developers should avoid creating or modifying resources here.
2. kube-public
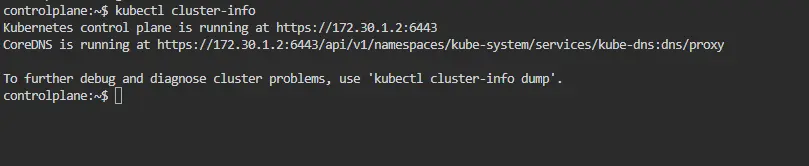
The kube-public namespace stores publicly accessible cluster data. It includes a ConfigMap with cluster information, which users can access without authentication. For example, typing:
kubectl cluster-inforetrieves the data stored in the kube-public namespace.
3. kube-node-lease
The kube-node-lease namespace is a recent addition to Kubernetes. It tracks the heartbeats of nodes, and each node receives its own lease object in this namespace. These objects record node availability, which allows the cluster to monitor node health efficiently.
4. default
The default namespace serves as the starting point for creating resources in a new cluster. When you do not specify a namespace while deploying resources, Kubernetes automatically places them in the default namespace. This behavior simplifies resource management, especially in small clusters or initial deployments.
When to Use Namespaces in Kubernetes
Namespaces are not always required in every Kubernetes setup, but they become extremely useful as your cluster grows in size or complexity. Understanding when to use namespaces helps you maintain better organization, access control, and resource management within your cluster.
1. When You Have Multiple Teams or Projects
If multiple teams share the same Kubernetes cluster, using namespaces ensures that each team has its own isolated environment. For example, you can create namespaces like frontend, backend, and database — or by teams such as dev-team, qa-team, and ops-team. This separation prevents accidental modifications to other teams’ resources.
2. When Managing Multiple Environments
Namespaces are ideal when you run multiple environments — such as development, staging, and production — within a single cluster. Each environment can have its own namespace, which keeps configurations, services, and secrets isolated. This approach also makes CI/CD pipelines more predictable and reduces deployment risks.
3. When You Need Resource Quotas
If you want to control resource usage across teams or applications, namespaces allow you to define ResourceQuotas and LimitRanges. These settings ensure fair usage of cluster resources like CPU, memory, and storage. For example, the staging namespace can have limited CPU, while production gets more resources for reliability.
4. When You Require Access Control and Security
Namespaces work well when you need to enforce security boundaries using RBAC (Role-Based Access Control). You can assign roles and permissions at the namespace level, giving users access only to what they need. This minimizes security risks and ensures least-privilege access.
5. When You Need Logical Organization
Even in single-team environments, namespaces help organize resources logically. You can categorize resources by application type, function, or department. This makes it easier to locate, monitor, and maintain cluster components.
6. When You Share a Cluster for Cost Efficiency
Organizations often share a single Kubernetes cluster among multiple teams to reduce infrastructure costs. Namespaces make this possible by providing isolation without the overhead of creating multiple clusters. Each namespace behaves like a virtual cluster within the main cluster.
7. When You Need Faster Cleanup and Testing
For testing or temporary deployments, namespaces simplify cleanup. You can delete a namespace to remove all its resources instantly, which is faster than deleting individual deployments, pods, or services. This approach is perfect for CI/CD testing environments.
Creating Namespaces
We can create a Namespace in two ways:
1. CLI Commands
Namespaces can be added to your Cluster by CLI commands. You can simply enter the following command to create a new Namespace:
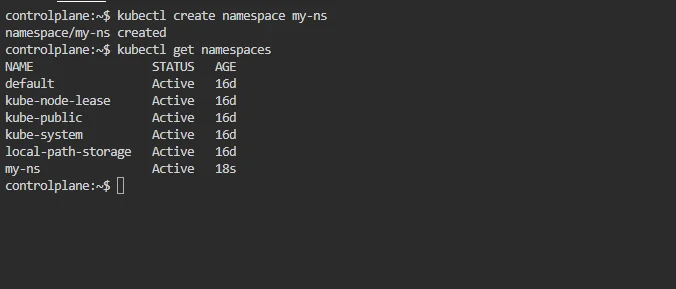
kubectl create namespace my-ns
This will create a new Namespace called “my-ns”. And we can simply checkout our namespaces by the following command:
kubectl get namespaces
We can see that the “my-ns” Namespace was created.
2. Configuration file
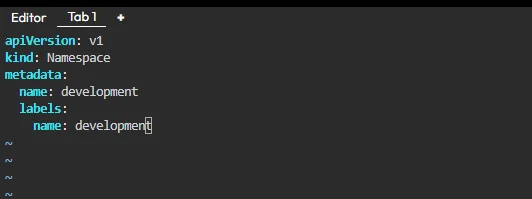
Another better way to create a Namespace is creating a Namespaces configuration file. You can call it a better way of creating Namespaces because you have a history in your Configuration File Repository of what resources you created in the Cluster. Here is how a sample Namespace configuration file would appear to be:
apiVersion: v1
kind: Namespace
metadata:
  name: development
  labels:
    name: development
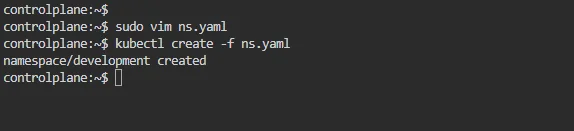
Now you can apply this configuration file using the following command:
kubectl create -f [FILE_NAME]
Creating Components in the default Namespace
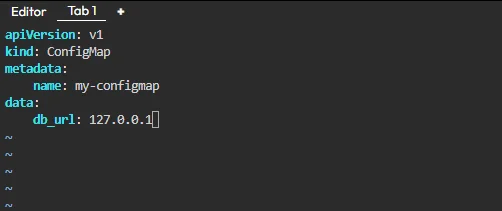
By default if you do not provide a Namespace to a component, then it creates them in a default namespace. So if we apply this config map component:
apiVersion: v1
kind: ConfigMap
metadata:
    name: my-configmap
data:
    db_url: 127.0.0.1
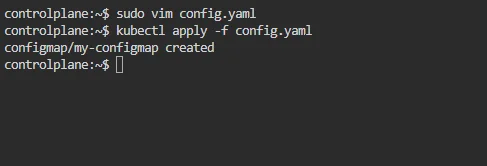
If we apply this Config Map file:
kubectl apply -f config.yaml
And check the namespace it belongs to by this command, actually this command will list down all the Config Maps within the Namespace default:
kubectl get configmap -n default

And we can find our my-configmap in the list.
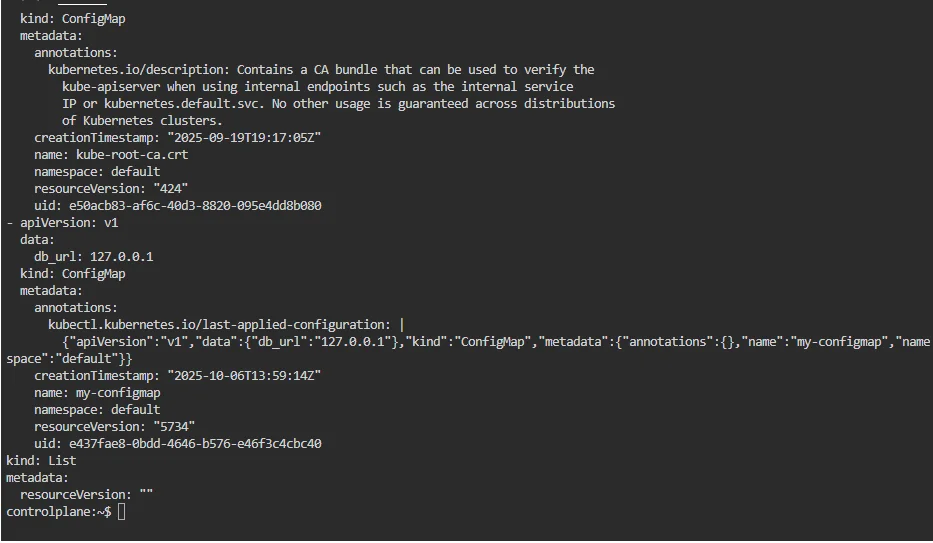
Or you can also check it by getting details about my-configmap using the following command:
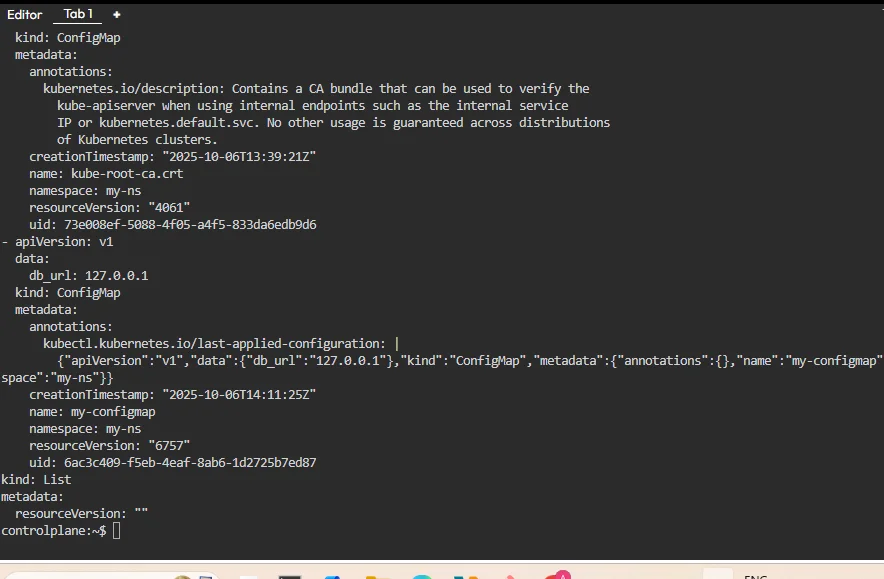
kubectl get configmap -n default -o yaml
You will get a long output which will include these lines
Creating Components in a new Namespace
There are two ways of creating components, we can either do it in the CLI or we configure it in the Configuration file itself:
1. Specifying Namespace in the CLI
This can be done by specifying the name of the Namespace while applying the Config Map:
kubectl apply -f my-config-map.yaml --namespace=my-ns
Note that we have already created my-ns in the previous sections. Otherwise it would give us an error.
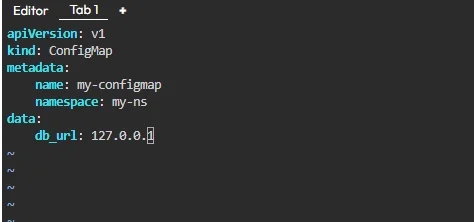
2. Specifying Namespace in the Configuration file
We can simply specify which namespace we want the component to be a part of it’s configuration file. For that we can simply take our my-configuration.yaml file and edit it. We are simply adding the line “namespace: my-ns”
apiVersion: v1
kind: ConfigMap
metadata:
    name: my-configmap
    namespace: my-ns
data:
    db_url: 127.0.0.1
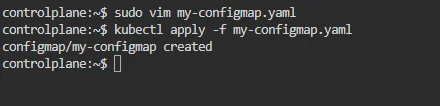
Now if we apply it:
kubectl apply -f my-configmap.yaml
and if we check out our Config Map:
kubectl get configmap -n my-ns -o yaml
We will get that same long output, but this would also include a line which says that the Namespace is now my-ns.
Changing the Active Namespace
The default namespace is our active namespace. In order to change the active namespace to any other namespace we can use kubens from kubectx. For that we will have to download kubectx by entering the following command
sudo snap install kubectx --classic
now if we enter the command
kubens
we will get the list of namespaces present and the active namespace will be highlighted in green:

and then simply use kubens for changing the active namespace.
kubens my-ns
Now the active namespace has been changed to kubens. This means that by default if we do not specify the namespace the components will be created in the my-ns namespace.
Benefits of Kubernetes Namespaces
Kubernetes Namespaces provide several key advantages that help teams manage complex applications and multi-tenant clusters more effectively. By logically dividing cluster resources, Namespaces improve security, scalability, and operational efficiency.
1. Resource Isolation
Namespaces isolate workloads within the same cluster. This means different teams, environments, or applications can operate independently without interfering with one another. For example, a development team can work in the dev namespace while the production team operates in the prod namespace, ensuring smooth parallel operations.
2. Access Control and Security
With Namespaces, you can apply Role-Based Access Control (RBAC) policies to limit access to specific resources. This ensures that users or service accounts can only interact with the resources within their assigned namespaces, significantly enhancing cluster security.
3. Simplified Resource Management
Namespaces help organize and manage resources more easily. Administrators can categorize deployments, services, and configurations by project, environment, or team. This structure simplifies cluster monitoring and troubleshooting since resources are grouped logically.
4. Resource Quotas and Limits
Administrators can use ResourceQuotas and LimitRanges within a namespace to control CPU, memory, and storage usage. This prevents any single team or application from consuming excessive resources, helping maintain cluster stability and performance.
5. Easier Multi-Tenancy
Namespaces enable multi-tenancy by allowing multiple users or teams to share the same Kubernetes cluster safely. Each tenant can have its own namespace with isolated policies, quotas, and permissions, reducing operational overhead and cost.
6. Better Organization for CI/CD Pipelines
Namespaces integrate seamlessly with CI/CD workflows. For instance, you can deploy each stage — development, staging, and production — in separate namespaces. This separation ensures that testing or updates in one environment don’t disrupt others, streamlining the delivery process.
7. Simplified Cleanup and Maintenance
When you no longer need a specific environment or project, you can delete its namespace to remove all associated resources at once. This feature simplifies cleanup and keeps your cluster organized and efficient.
Conclusion
Kubernetes Namespaces play a crucial role in managing modern, large-scale Kubernetes clusters. They provide a logical way to organize, isolate, and secure resources, making cluster administration simpler and more efficient. By dividing a cluster into multiple namespaces, you can improve collaboration among teams, maintain cleaner environments, and enforce access and resource control with ease.
Moreover, namespaces empower organizations to implement multi-tenancy, define resource quotas, and follow best practices for CI/CD and environment management. Whether you’re running small projects or enterprise-grade deployments, using namespaces strategically ensures that your Kubernetes infrastructure remains scalable, secure, and easy to maintain.
