
Docker containers work really well with stateless applications—apps that don’t need to save data—because everything inside a container disappears when it stops, crashes, or is replaced. Any changes you make inside the container are not saved permanently.
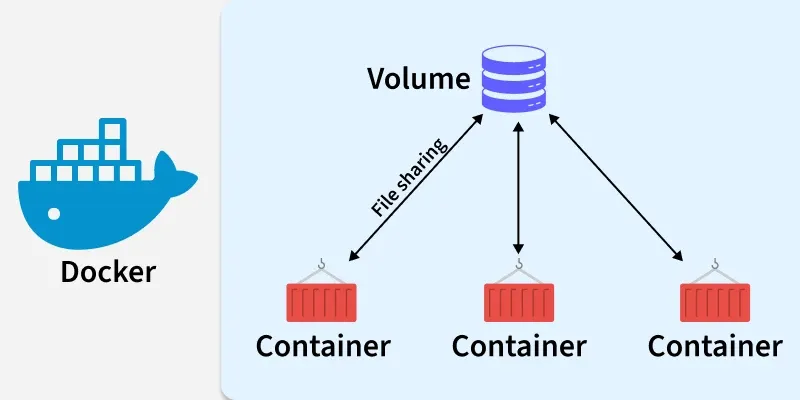
But what if your application needs to save data, like a database or a file server? That’s where Docker volumes come in. Volumes are like special storage areas that live outside the container. They keep your data safe even if the container is deleted or replaced. You can also share the same volume between multiple containers.
In this article, we’ll explain what Docker volumes are, why they are useful, and show some simple examples of how to use them with Docker .
What Are Docker Volumes?
Volumes are a mechanism for storing data outside containers. All volumes are managed by Docker and stored in a dedicated directory on your host, usually /var/lib/docker/volumes for Linux systems.
Volumes are mounted to filesystem paths in your containers. When containers write to a path beneath a volume mount point, the changes will be applied to the volume instead of the container’s writable image layer. The written data will still be available if the container stops – as the volume’s stored separately on your host, it can be remounted to another container or accessed directly using manual tools.
Volumes work with both Linux and Windows containers. Several different drivers are available to store volume data in different services. Local storage on your Docker host is the default, but NFS volumes, CIFS/Samba shares, and device-level block storage adapters are available as alternatives. Third-party plugins can add extra storage options too.
Bind Mounts vs. Docker Volumes
Bind mounts are another way to give containers access to files and folders on your host. They directly mount a host directory into your container. Any changes made to the directory will be reflected on both sides of the mount, whether the modification originates from the host or within the container.
Bind mounts are best used for ad-hoc storage on a short-term basis. They’re convenient in development workflows. For example: bind mounting your working directory into a container automatically synchronizes your source code files, allowing you to immediately test changes without rebuilding your Docker image.
Volumes are a better solution when you’re providing permanent storage to operational containers. Because they’re managed by Docker, you don’t need to manually maintain directories on your host. There’s less chance of data being accidentally modified and no dependency on a particular folder structure. Volume drivers also offer increased performance and the possibility of writing changes directly to remote locations.
Independent Lifecycle of Docker Volumes
Unlike a container, which disappears when it is stopped or deleted, a Docker volume lives on its own. This means the data inside a volume does not depend on the container and stays safe even if the container is removed. This makes volumes perfect for storing important and long-lasting data such as databases, configuration files, or logs.
1. Data Stays Safe
When you delete a container, Docker removes the container’s writable layer, which means all changes inside the container are lost. However, any data stored in a volume remains intact. This is because volumes exist outside the container’s filesystem. You can attach the same volume to a new container later, and your data will still be there, just like reopening a saved file on your computer. This makes volumes a reliable way to ensure that important information is never accidentally deleted.
2. Share Data Between Containers
A single volume can be mounted into multiple containers at the same time. This allows several containers to read and write data in the same location. For example, if you have multiple web servers running the same application, they can all use a shared volume to access uploaded images or configuration files. This makes collaboration between containers easy and ensures that all containers always have access to the latest data.
3. Cleaning Up Volumes
Docker volumes are not automatically deleted, even if no container is using them. This prevents accidental loss of important data. However, unused volumes can accumulate and take up space. To clean them up, Docker provides the command:
docker volume pruneThis removes all volumes that are not currently in use by any container. By managing volumes carefully, you can keep your system clean while still protecting critical data.
Overall, the independent lifecycle of volumes gives you flexibility, safety, and control over your data. You can stop, remove, or replace containers without worrying about losing important files. This makes Docker volumes a key tool for running stateful applications like databases, file servers, or any app that needs to save data permanently.
How Docker Volumes Work Internally
Docker volumes may seem simple from the outside, but behind the scenes, several components work together to manage and maintain persistent storage. Understanding how these components interact helps you troubleshoot issues, optimize performance, and make better storage decisions for your containers.
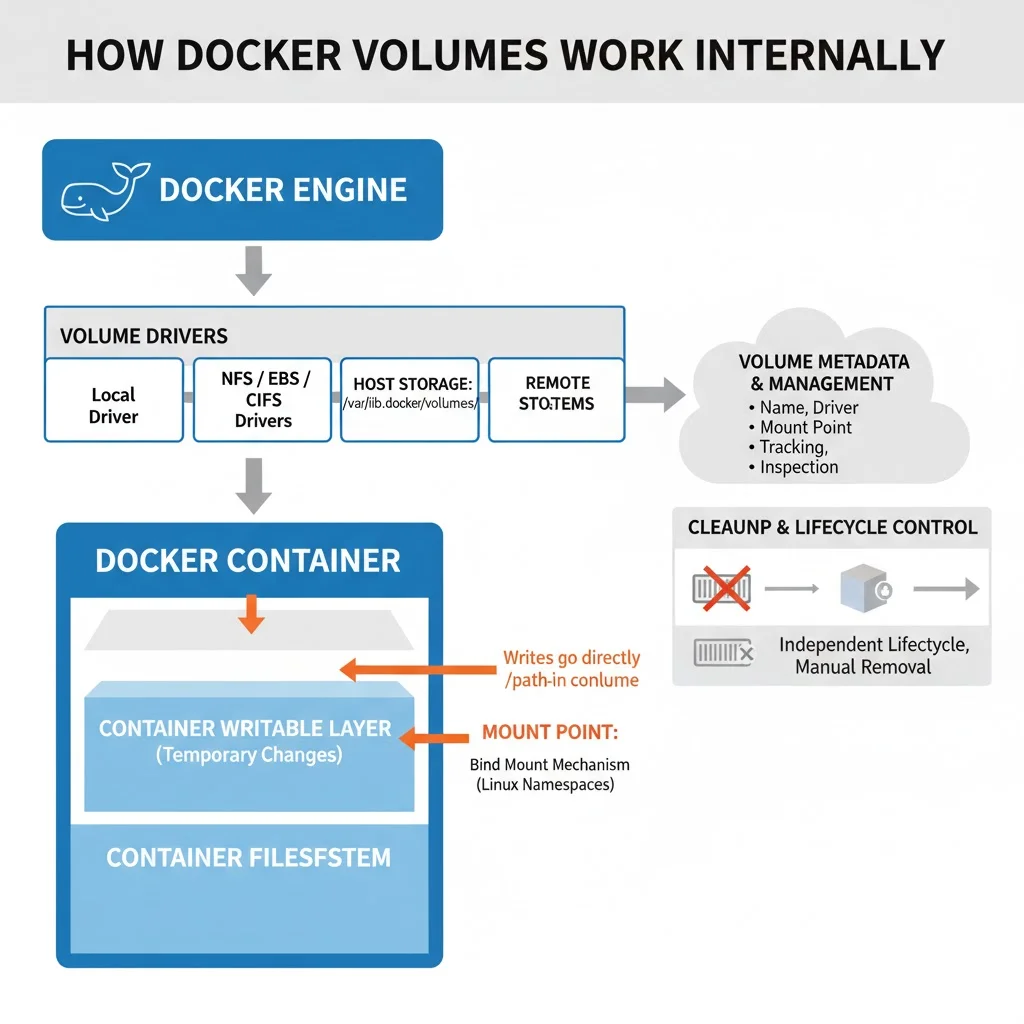
1. Docker Engine
The Docker Engine manages containers, images, networks, and volumes. It coordinates volume creation, determines drivers, and mounts volumes inside containers, acting as the bridge between containers and host storage.
2. Volume Drivers
Volume drivers define where and how volume data is stored. The default local driver saves data on the host, while other drivers like NFS, EBS, or CIFS allow storing volumes remotely or on custom storage systems.
3. Storage Location on Host
When a volume is created, Docker stores it under /var/lib/docker/volumes/. This directory holds the actual persistent data, ensuring it remains safe and available even if containers are removed.
4. Mounting Mechanism
During container startup, Docker mounts the volume into the container’s filesystem using Linux namespaces and bind mounts. This makes volume data accessible inside the container just like a regular folder.
5. Container Writable Layer
Containers have a temporary writable layer for changes, but when a volume is mounted, writes go directly to the volume instead. This ensures data persistence and better performance compared to container storage.
6. Volume Metadata and Management
Docker keeps metadata for each volume—such as name, driver, and mount point—allowing easy tracking and inspection. This helps manage relationships between containers and volumes efficiently.
7. Cleanup and Lifecycle Control
Docker volumes have an independent lifecycle and aren’t deleted with containers. They remain available until manually removed, allowing safe data reuse across different container instances.
When to Use Docker Volumes?
Volumes are designed to support the deployment of stateful Docker containers. You’ll need to use a volume when a container requires persistent storage to permanently save new and modified files.
Typical volume use cases include the following:
- Database storage – You should mount a volume to the storage directories used by databases such as MySQL, Postgres, and Mongo. This will ensure your data persists after the container stops.
- Application data – Data generated by your application, such as file uploads, documents, and profile photos, should be stored in a volume.
- Essential caches – Consider using a volume to persist the contents of any caches, which would take significant time to rebuild.
- Convenient data backups – Docker’s centralized volume storage makes it easy to backup container data by mirroring /var/lib/docker/volumes to another location. Community tools and Docker Desktop extensions can automate the process, providing a much simpler experience than manually copying individual bind-mounted directories.
- Share data between containers – Docker volumes can be mounted to multiple containers simultaneously. Containers have real-time access to the changes made by their neighbors.
- Write to remote filesystems – You’ll need to use a volume when you want containers to write to remote filesystems and network shares. This can facilitate simpler workflows for applications that interact with your LAN resources.
You don’t need to mount a volume to containers that don’t have writable filesystem paths or that only store disposable content. As a general rule, create a volume when your container’s writing data which will cause disruption if it’s lost
Creating and Using Docker Volumes
Step1: Create a Volume
docker volume create mydata
Step2: Verify the Volume
docker volume ls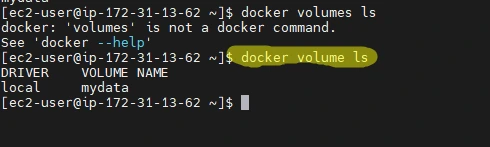
Step 3: Run a Container with the Volume Attached
docker run -d \
  --name mynginx \
  -v mydata:/usr/share/nginx/html \
  nginx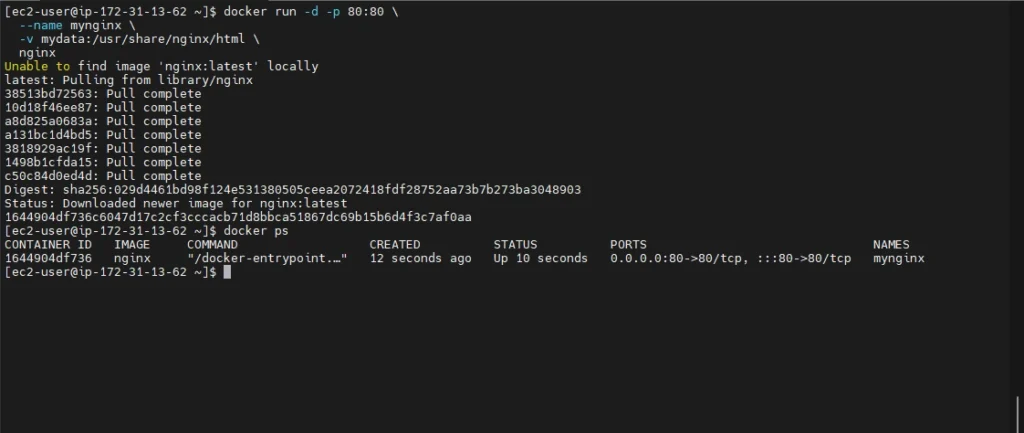
-v mydata:/usr/share/nginx/html means mount the volume mydata to the container’s web root directory.
Step 4: Add Data into the Volume
Let’s put some content into it:
docker exec -it mynginx bash
echo "Hello from Docker Volume!" > /usr/share/nginx/html/index.html
exit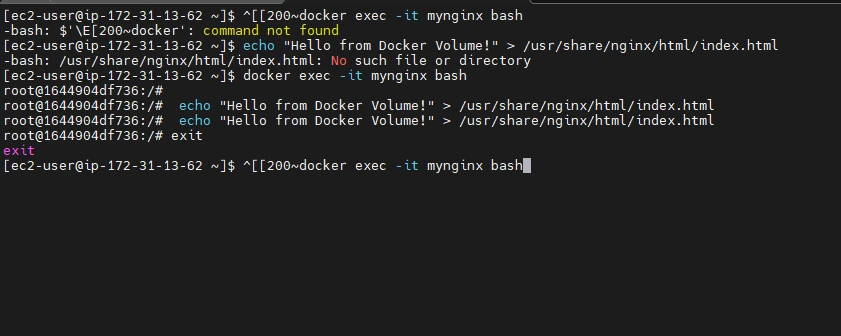
Now open your browser and visit http://localhost:80
You’ll see “Hello from Docker Volume!”

Step 5: Verify Persistence
Now remove the container:
docker rm -f mynginxCreate a new container using the same volume:
docker run -d \
  --name newnginx \
  -v mydata:/usr/share/nginx/html \
  nginx

Visit http://localhost:80 again —
The data is still there! The volume persisted even after the first container was deleted.

Best Practices for Managing Docker Volumes
Managing Docker volumes efficiently is essential to ensure data safety, performance, and smooth operations across your containers. Following a few best practices helps maintain a clean, secure, and reliable Docker environment.
1. Use Clear and Descriptive Volume Names
Always use meaningful names for your volumes instead of relying on randomly generated ones. For example, instead of mydata12345, use names like app-db-data or nginx-html-volume. This makes it easier to identify the purpose of each volume when managing multiple containers or debugging issues.
Example:
docker volume create app-db-data2. Regularly Clean Up Unused Volumes
Over time, unused volumes can accumulate and consume disk space. Use the following command to remove volumes not currently used by any container:
docker volume pruneThis ensures that your system stays clean and free of unnecessary data.
3. Backup Important Volumes
Since volumes often store critical data, such as databases or user uploads, it’s important to back them up regularly. You can simply archive a volume’s directory from the Docker host, or use community tools and Docker Desktop extensions for automated backups.
Example:
docker run --rm \
  -v app-db-data:/data \
  -v $(pwd):/backup \
  busybox tar czvf /backup/db-backup.tar.gz /data
4. Use Read-Only Mounts for Security
If your container only needs to read data from a volume, mount it as read-only using the :ro flag. This prevents accidental or unauthorized changes to critical files.
Example:
docker run -d \
  -v config-volume:/app/config:ro \
  myapp
5. Avoid Storing Sensitive Data in Plaintext
Avoid placing credentials, keys, or tokens directly inside Docker volumes. Instead, use Docker Secrets or a Key Management Service (KMS) for secure handling of sensitive data. This adds an extra layer of protection against unauthorized access.
6. Monitor Volume Usage
Keep track of your volume usage to avoid running out of disk space. You can check size and mount information with:
docker system df -vMonitoring helps you detect large or unused volumes that may need cleanup or compression.
7. Use Named Volumes Over Bind Mounts in Production
In development, bind mounts are convenient for syncing source code. However, in production environments, named volumes are more reliable since they’re managed by Docker and not tied to a specific host directory. This improves portability and reduces manual management overhead
Conclusion
Docker volumes are one of the most powerful features that make containerized applications both flexible and reliable. They bridge the gap between the ephemeral nature of containers and the need for persistent data storage. By using volumes, developers can ensure data safety, enable data sharing between containers, and maintain a clean separation between application logic and data storage. Whether you’re running databases, web servers, or any other stateful workloads, Docker volumes help you maintain consistent, durable, and portable storage without compromising performance or security. When used with proper naming, cleanup, and backup strategies, volumes can significantly simplify container management and data lifecycle control in any environment—from local development to large-scale production systems.
