Introduction
Building a production ready anti ddos gateway became a critical priority when my team at Maachao needed to protect our high-frequency real-time networking infrastructure from automated botnets and port scanners. We required something more robust than a standard reverse proxy setup, and the challenge demanded a secure gateway that could actively defend against attackers while handling UDP streams across thousands of ports. This engineering journey taught me invaluable lessons about Linux system administration, security hardening, and automated defense mechanisms that I want to share in detail. The result is a comprehensive approach to creating a production ready anti ddos gateway using Nginx and UFW that any organization can implement to protect their critical infrastructure.
The Architecture Overview
The gateway architecture I designed follows a layered security model where each component provides specific protection while working in concert with the others. At the outermost layer, AWS security groups and UFW firewalls control network access at both the cloud infrastructure and operating system levels. Behind these firewalls sits Nginx, configured as a reverse proxy with sophisticated rate limiting capabilities. The final layer is a Node.js application running on port 3000, completely invisible to the outside world thanks to strict firewall rules. What makes this architecture particularly effective is the active defense script I wrote that automatically bans malicious IPs at the firewall level when they trigger too many rate limiting events.

System Architecture
High-Level Architecture Overview
The Maachao Gateway employs a defense-in-depth strategy with four distinct security layers, each providing specific protections while working in concert to create a comprehensive security posture. This layered approach ensures that even if one layer is compromised, subsequent layers continue to provide protection against malicious actors.
Internet → AWS Security Group → UFW Firewall → Nginx Reverse Proxy → Node.js Application
           (Cloud Layer)      (OS Layer)    (Application Layer)   (Service Layer)
Layer_1: Cloud Infrastructure Security
The outermost protection layer operates at the AWS infrastructure level, providing network segmentation before traffic ever reaches the EC2 instance. The security group acts as a virtual firewall at the hypervisor level, blocking unwanted traffic before it consumes any instance resources.
Inbound Rules Configuration:
Type	Protocol	Port Range	Source	Purpose
SSH	TCP	2222	Admin IP Range	Secure administrative access
HTTP	TCP	80	0.0.0.0/0	Public web traffic
HTTPS	TCP	443	0.0.0.0/0	Encrypted web traffic
Custom UDP	UDP	10000-20000	0.0.0.0/0	Real-time streaming
This cloud-level filtering provides several critical advantages. It blocks distributed denial of service traffic before it reaches the instance, preventing resource exhaustion at the operating system level. The security group also serves as a centralized management point for network access policies, allowing changes without accessing individual servers. Perhaps most importantly, it provides an additional layer of protection against misconfigurations at the operating system level, ensuring that even if UFW is accidentally disabled, the instance remains protected.
Layer_2: Operating System Firewall
Within the EC2 instance, UFW implements a second layer of filtering that enforces the principle of least privilege. This internal firewall assumes that all incoming traffic is malicious by default and requires explicit exceptions for legitimate services.
┌─────────────────────────────────────┐
│         UFW Firewall                │
├─────────────────────────────────────┤
│ Default Policy: Deny All Incoming   │
│ Default Policy: Allow All Outgoing  │
├─────────────────────────────────────┤
│ Allowed Ports:                       │
│ ✓ 2222/tcp (SSH)                    │
│ ✓ 80/tcp (HTTP)                      │
│ ✓ 443/tcp (HTTPS)                    │
│ ✓ 10000-20000/udp (Streaming)        │
├─────────────────────────────────────┤
│ Blocked Ports:                       │
│ ✗ 3000/tcp (Node.js direct access)  │
│ ✗ All other ports                    │
└─────────────────────────────────────┘
The UFW configuration creates a critical security boundary by explicitly denying access to port 3000, where the Node.js application listens. This forces all application traffic through the Nginx reverse proxy, ensuring that rate limiting, security headers, and logging are consistently applied to every request. Without this rule, attackers could bypass Nginx entirely and directly attack the application server.
Layer_3: Reverse Proxy with Rate Limiting
Nginx operates as the application-layer gateway, implementing sophisticated traffic management policies that protect the upstream Node.js service from abuse. The rate limiting configuration creates a shared memory zone that tracks requests by client IP address, enforcing a strict limit of five requests per second with a burst allowance of ten requests.
┌─────────────────────────────────────────────────┐
│              Nginx Reverse Proxy                 │
├─────────────────────────────────────────────────┤
│                                                   │
│  Request Flow:                                    │
│  ┌─────────┐                                      │
│  │ Client  │──┐                                   │
│  └─────────┘  │                                   │
│               ▼                                   │
│  ┌─────────────────────┐                          │
│  │ Rate Limiting Zone  │                          │
│  │ 10MB shared memory  │                          │
│  │ Limit: 5 requests/s │                          │
│  │ Burst: 10           │                          │
│  └──────────┬──────────┘                          │
│             │                                      │
│      ┌──────┴──────┐                              │
│      ▼             ▼                              │
│  ┌─────────┐  ┌─────────┐                         │
│  │ Under   │  │ Over    │                         │
│  │ Limit   │  │ Limit   │                         │
│  └────┬────┘  └────┬────┘                         │
│       │            │                              │
│       ▼            ▼                              │
│  ┌─────────┐  ┌─────────┐                         │
│  │ Proxy to│  │ Return  │                         │
│  │ Port    │  │ 429     │                         │
│  │ 3000    │  │ Error   │                         │
│  └─────────┘  └─────────┘                         │
│                                                   │
└─────────────────────────────────────────────────┘
The Nginx configuration also adds critical security headers to every response, providing protection against common web vulnerabilities. The X-Frame-Options header prevents clickjacking attacks by controlling whether the page can be embedded in frames. The X-Content-Type-Options header stops browsers from MIME-type sniffing, reducing the risk of drive-by download attacks. The X-XSS-Protection header enables cross-site scripting filters in modern browsers, adding another layer of client-side protection.
Layer_4: Node.js Application Service
The innermost layer consists of a lightweight Node.js Express application that provides the actual API functionality. This service runs in complete isolation from the public internet, bound only to localhost on port 3000, ensuring that all requests must traverse the Nginx proxy layer.
┌─────────────────────────────────────┐
│     PM2 Process Manager             │
├─────────────────────────────────────┤
│  ┌─────────────────────────────────┐│
│  │ Node.js Application             ││
│  │ Port: 3000 (localhost only)     ││
│  │ Endpoints:                       ││
│  │ • GET /health                    ││
│  │ • GET /api/status                ││
│  └─────────────────────────────────┘│
│                                     │
│  Auto-restart on failure ✓          │
│  Startup on boot ✓                  │
│  Process monitoring ✓               │
└─────────────────────────────────────┘
PM2 provides production-grade process management that ensures the application remains available even after crashes or server reboots. The process manager runs as a systemd service, integrating with the operating system’s init system to start automatically during boot. It continuously monitors the application process, restarting it immediately if it terminates unexpectedly and maintaining logs for debugging and audit purposes.
Active Defense System Architecture
The active defense system operates as a separate control plane that continuously monitors traffic patterns and automatically enforces blocking decisions at the firewall level. This creates a feedback loop where the system learns from attack patterns and adapts its defenses without human intervention.
┌─────────────────────────────────────────────────────┐
│              Active Defense System                   │
├─────────────────────────────────────────────────────┤
│                                                      │
│  ┌─────────┐    ┌─────────┐    ┌─────────┐          │
│  │ Nginx   │───▶│ Access  │───▶│ Defender│          │
│  │ Logs    │    │ Logs    │    │ Script  │          │
│  └─────────┘    └─────────┘    └────┬────┘          │
│                                     │               │
│                                     ▼               │
│  ┌─────────┐    ┌─────────┐    ┌─────────┐          │
│  │ UFW     │◀───│ Cron    │◀───│ IP      │          │
│  │ Rules   │    │ Job     │    │ Analysis│          │
│  └─────────┘    └─────────┘    └─────────┘          │
│                                                      │
│  Data Flow:                                          │
│  1. Nginx generates access logs                      │
│  2. Cron triggers defender.sh every minute           │
│  3. Script parses logs for 429 errors                │
│  4. IPs exceeding threshold identified               │
│  5. UFW rules added to block malicious IPs           │
│  6. Ban events logged for audit                      │
└─────────────────────────────────────────────────────┘
The defender script implements a multi-stage analysis pipeline that ensures accurate and efficient blocking decisions. It first extracts the most recent log entries, focusing on the last one hundred lines to balance thoroughness with performance. Regular expression validation ensures that only legitimate IPv4 addresses are processed, preventing log injection attacks that might attempt to create malformed firewall rules. The script checks existing UFW rules before adding new bans, avoiding duplicate entries that would clutter the firewall configuration.
Network Traffic Flow
Understanding the complete path of a request through the system reveals how each layer contributes to overall security:
Client Request (Internet)
        ↓
[AWS Security Group]
  • Validates against cloud firewall rules
  • Drops traffic to unapproved ports
  • Blocks at infrastructure level
        ↓
[UFW Firewall]
  • Applies OS-level filtering
  • Verifies port 3000 is blocked
  • Logs denied connection attempts
        ↓
[Nginx Reverse Proxy]
  • Updates rate limiting counter for client IP
  • Checks if rate limit exceeded
  • Adds security headers
  • Forwards to port 3000 if under limit
        ↓
[Node.js Application]
  • Processes valid API request
  • Returns JSON response
  • Logs request for monitoring
        ↓
Response returns to client through same path
For malicious traffic that triggers rate limiting, the flow diverges at the Nginx layer:
Excessive Requests from Single IP
        ↓
[Nginx Rate Limiting]
  • Detects >5 requests per second
  • Returns 429 Too Many Requests
  • Logs 429 status with client IP
        ↓
[Defender Script (cron)]
  • Scans logs every minute
  • Counts 429 occurrences per IP
  • Identifies IPs with >3 violations
        ↓
[UFW Firewall Update]
  • Adds permanent deny rule for offending IP
  • Logs ban action with timestamp
  • Future requests blocked at firewall
Component Interaction Matrix
The following matrix illustrates how each security component addresses specific threats and how they complement each other:
| Threat Vector | AWS Security Group | UFW Firewall | Nginx Rate Limiting | Defender Script |
|---|---|---|---|---|
| Port Scanning | Blocks unapproved ports | Secondary verification | Not applicable | Not applicable |
| DDoS Attacks | Basic filtering | Resource protection | Rate limiting | Permanent bans |
| Direct App Access | Allows port 80 only | Blocks port 3000 | Requires proxy | Not applicable |
| Brute Force | SSH port protection | Connection tracking | Request limiting | IP banning |
| Web Vulnerabilities | Not applicable | Not applicable | Security headers | Not applicable |
| Persistent Attackers | Temporary protection | Temporary protection | Temporary throttling | Permanent blocking |
Deployment Topology
The complete system deploys on a single EC2 instance with careful attention to service isolation and resource management:
┌─────────────────────────────────────────┐
│         EC2 Instance                     │
│         t2.micro or larger               │
├─────────────────────────────────────────┤
│                                         │
│  ┌─────────────────────────────────┐   │
│  │         System Services          │   │
│  │  • SSH (port 2222)              │   │
│  │  • systemd                       │   │
│  │  • cron                          │   │
│  └─────────────────────────────────┘   │
│                                         │
│  ┌─────────────────────────────────┐   │
│  │         Nginx                    │   │
│  │  • Port 80 listener              │   │
│  │  • Rate limiting zone            │   │
│  │  • Reverse proxy to 3000         │   │
│  └─────────────────────────────────┘   │
│                                         │
│  ┌─────────────────────────────────┐   │
│  │         PM2                       │   │
│  │  • Process monitoring             │   │
│  │  • Auto-restart                   │   │
│  │  • Startup management              │   │
│  └─────────────────────────────────┘   │
│                    │                    │
│  ┌─────────────────▼─────────────────┐ │
│  │      Node.js Application           │ │
│  │      Port 3000 (localhost)         │ │
│  │      • /api/status endpoint        │ │
│  │      • /health endpoint            │ │
│  └─────────────────────────────────┘ │
│                                         │
│  ┌─────────────────────────────────┐   │
│  │         Logging System            │   │
│  │  • Nginx access logs              │   │
│  │  • Nginx error logs               │   │
│  │  • Defender activity logs         │   │
│  │  • System syslog                  │   │
│  └─────────────────────────────────┘   │
└─────────────────────────────────────────┘
Security Posture Summary
The layered architecture achieves defense in depth through complementary security mechanisms:
Infrastructure-level protection through AWS security groups provides the first line of defense, blocking entire classes of attacks before they consume instance resources. Operating system firewalls add a second layer that enforces strict access controls and prevents direct service access. Application-layer rate limiting protects against resource exhaustion and abuse while maintaining service availability for legitimate users. The active defense system creates an adaptive security posture that learns from attacks and automatically strengthens protections over time.
This architecture demonstrates that effective security emerges not from any single technology but from the thoughtful integration of multiple protective layers, each addressing specific threats while supporting and enhancing the others. The result is a resilient system capable of withstanding automated attacks while maintaining high availability for legitimate users.
Provisioning the Server and Initial Access
The journey began with provisioning an Ubuntu 22.04 server on AWS EC2. While this might sound straightforward, the real complexity emerged when I needed to reconfigure the SSH port from the default 22 to a more secure 2222. This seemingly simple change requires careful orchestration between the SSH daemon configuration, the Uncomplicated Firewall rules, and the AWS security group settings. I learned this the hard way when I temporarily locked myself out of the server, which led me to develop a foolproof method for changing SSH ports that I now consider essential for any production deployment.
The key insight is to never make changes that could sever your access without a verified fallback. I first added port 2222 to both the AWS security group and the local UFW rules while keeping port 22 open. Then I modified the SSH configuration to listen on both ports simultaneously, which required understanding Ubuntu’s modern approach to SSH socket activation. The default configuration uses systemd socket activation, meaning the ssh.socket file controls which ports the service listens on rather than the traditional sshd_config file alone. After discovering this through careful troubleshooting, I created an override configuration that explicitly defined both ports.
bash
sudo mkdir -p /etc/systemd/system/ssh.socket.d
sudo nano /etc/systemd/system/ssh.socket.d/ports.conf
Within this override file, I specified the listening ports with a clear syntax that first clears any existing configuration before adding the new ports.
ini
[Socket]
ListenStream=
ListenStream=22
ListenStream=2222
After reloading the systemd daemon and restarting the socket, I verified that SSH was listening on both ports using the ss command. Only after confirming this in a terminal session did I test the new port 2222 connection from a separate window. With successful verification on the new port, I could safely remove port 22 from the security group and firewall rules, completing the migration without any service interruption.
Configuring the Firewall for Defense
The firewall configuration demanded meticulous attention to the specific requirements of our real-time networking architecture. Using UFW, I set the default policies to deny all incoming traffic while allowing all outgoing connections, which follows the principle of least privilege and ensures that only explicitly authorized services are reachable from the internet.
bash
sudo ufw default deny incoming
sudo ufw default allow outgoing
From there, I carefully opened only the necessary ports for our infrastructure. The custom SSH port 2222 needed access for administrative purposes, but I restricted it to specific administrative IP addresses to minimize exposure. The UDP range from 10000 to 20000 required opening for our real-time streaming protocols, which demanded careful consideration of both security and performance implications.
bash
sudo ufw allow 2222/tcp comment 'SSH custom port'
sudo ufw allow 10000:20000/udp comment 'UDP stream ports'
sudo ufw allow 80/tcp comment 'HTTP'
sudo ufw allow 443/tcp comment 'HTTPS'
One of the most critical rules was explicitly denying access to port 3000, where our Node.js application would eventually run. This ensures that all traffic to our application must pass through the Nginx reverse proxy, giving us a single point of control for security policies and rate limiting. Without this rule, attackers could bypass all the Nginx protections and directly hammer our application server.
bash
sudo ufw deny 3000/tcp comment 'Block direct Node.js access'
sudo ufw --force enable
After enabling the firewall, I verified each rule by attempting connections from external networks, confirming that only the explicitly allowed ports responded while all others remained silent. This verification step is crucial because a misconfigured firewall can either leave services exposed or break legitimate functionality.
Implementing the Nginx Reverse Proxy
With the firewall properly configured and tested, I turned my attention to the reverse proxy layer. Nginx serves as our gateway to the outside world, and its rate limiting capabilities form our first line of defense against DDoS attacks. The configuration I implemented uses a shared memory zone to track requests by IP address, limiting each client to five requests per second with a burst capacity of ten requests to accommodate temporary spikes.
nginx
limit_req_zone $binary_remote_addr zone=maachao_limit:10m rate=5r/s;

server {
    listen 80;
    server_name _;

    access_log /var/log/nginx/maachao_access.log;
    error_log /var/log/nginx/maachao_error.log;

    limit_req zone=maachao_limit burst=10 nodelay;
    limit_req_status 429;

    add_header X-Frame-Options "SAMEORIGIN" always;
    add_header X-Content-Type-Options "nosniff" always;
    add_header X-XSS-Protection "1; mode=block" always;

    location / {
        proxy_pass <http://localhost:3000>;
        proxy_http_version 1.1;
        proxy_set_header Host $host;
        proxy_set_header X-Real-IP $remote_addr;
        proxy_set_header X-Forwarded-For $proxy_add_x_forwarded_for;
        proxy_set_header X-Forwarded-Proto $scheme;
    }
}
The limit_req_status 429 directive was particularly important because Nginx defaults to returning a 503 Service Unavailable error when rate limiting triggers. The 503 status code suggests server-side problems rather than client-side rate limiting, which can confuse API consumers and make debugging more difficult. By explicitly setting the status to 429, we provide clear feedback that the client has exceeded their allowed request rate.
Building the Node.js Controller
Behind this protective layer runs a simple but effective Node.js Express application that listens on port 3000. The application exposes a single endpoint at /api/status that returns a JSON response confirming the gateway is active and secure. While the application itself is minimal, its deployment strategy demonstrates production-ready practices that ensure reliability and maintainability.
javascript
const express = require('express');
const app = express();
const PORT = 3000;

app.use((req, res, next) => {
    console.log(`${new Date().toISOString()} -${req.method}${req.ip}${req.path}`);
    next();
});

app.get('/health', (req, res) => {
    res.status(200).json({ status: 'healthy', timestamp: new Date().toISOString() });
});

app.get('/api/status', (req, res) => {
    res.json({
        status: 'secure',
        message: 'Maachao Gateway Active',
        timestamp: new Date().toISOString(),
        clientIp: req.ip
    });
});

app.listen(PORT, 'localhost', () => {
    console.log(`Maachao API controller running on <http://localhost>:${PORT}`);
});
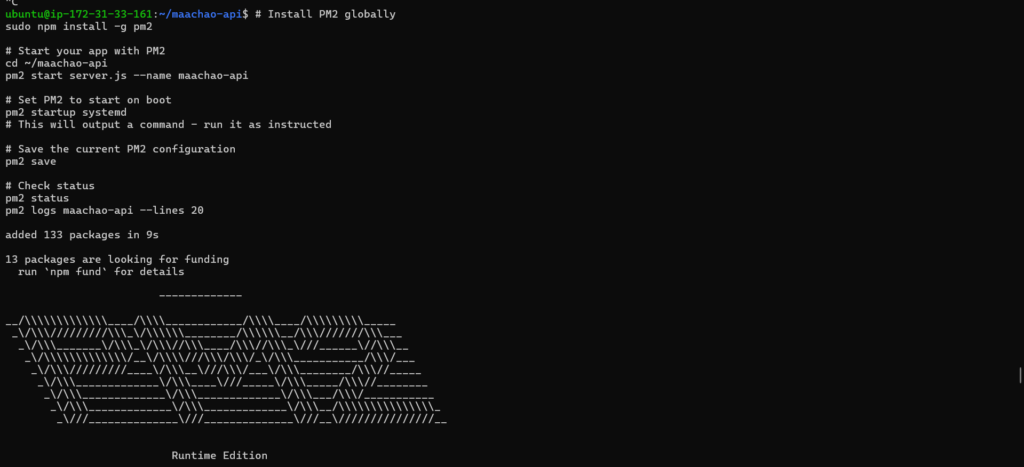
Using PM2 as a process manager ensures the application automatically restarts if it crashes and survives server reboots. The PM2 startup script integrates with systemd to guarantee the application launches during boot, long before any user requests arrive. This kind of attention to operational details separates professional deployments from experimental projects.
bash
sudo npm install -g pm2
pm2 start server.js --name maachao-api
pm2 startup systemd
pm2 save
Writing the Active Defense Script
The crown jewel of this entire setup is the active defense script I wrote in Bash. While Nginx rate limiting protects against excessive requests, it still consumes server resources processing each request. My defender script takes protection to the next level by permanently banning offending IPs at the firewall level, stopping malicious traffic before it even reaches Nginx.
bash
#!/bin/bash
LOG_FILE="/var/log/nginx/access.log"
THRESHOLD=3
BAN_LOG="/var/log/defender.log"
TEMPFILE="/tmp/defender_temp.txt"

log_message() {
    echo "$(date '+%Y-%m-%d %H:%M:%S') - $1" | sudo tee -a "$BAN_LOG"
}

log_message "===== Defender scan started ====="

tail -100 "$LOG_FILE" | grep " 429 " | awk '{print $1}' | sort | uniq -c | sort -nr > "$TEMPFILE"

while read -r line; do
    [ -z "$line" ] && continue
    count=$(echo "$line" | awk '{print $1}')
    ip=$(echo "$line" | awk '{print $2}')

    if [[ ! "$ip" =~ ^[0-9]+\\.[0-9]+\\.[0-9]+\\.[0-9]+$ ]]; then
        continue
    fi

    if [ "$count" -gt "$THRESHOLD" ]; then
        if sudo ufw status | grep -q "DENY.*$ip"; then
            log_message "IP $ip already banned"
        else
            log_message "BANNING IP $ip (count: $count)"
            sudo ufw deny from "$ip" comment "Auto-banned for $count x 429 errors"
        fi
    fi
done < "$TEMPFILE"

rm -f "$TEMPFILE"
log_message "===== Defender scan completed ====="
The script runs every minute via cron and scans the Nginx access logs for 429 status codes. When it detects an IP that has triggered more than three rate limiting events, it automatically executes a UFW deny rule against that address. The script includes sophisticated parsing logic that extracts IP addresses from log entries, validates them using regular expressions to ensure they are legitimate IPv4 addresses, checks whether they are already banned to avoid duplicate rules, and only then adds them to the firewall ruleset.
I included comprehensive logging so administrators can see exactly which IPs were banned and why, which is crucial for both security auditing and troubleshooting. The log file captures every scan cycle, every IP evaluation, and every ban action with timestamps that help correlate events with other system logs.
bash
sudo crontab -e
Within the crontab, I added a simple line that ensures the script runs every minute without generating any output that would clutter the system logs.
cron
* * * * * /home/ubuntu/scripts/defender.sh > /dev/null 2>&1
Testing the Complete System
Testing this entire stack required careful orchestration of multiple components working together. I verified the firewall rules by attempting to connect to various ports from external networks, confirming that only SSH on port 2222 and HTTP on port 80 responded to connection attempts while port 3000 remained stubbornly closed. The UDP port range required special testing tools, but a simple netcat command confirmed that the ports were reachable as expected.
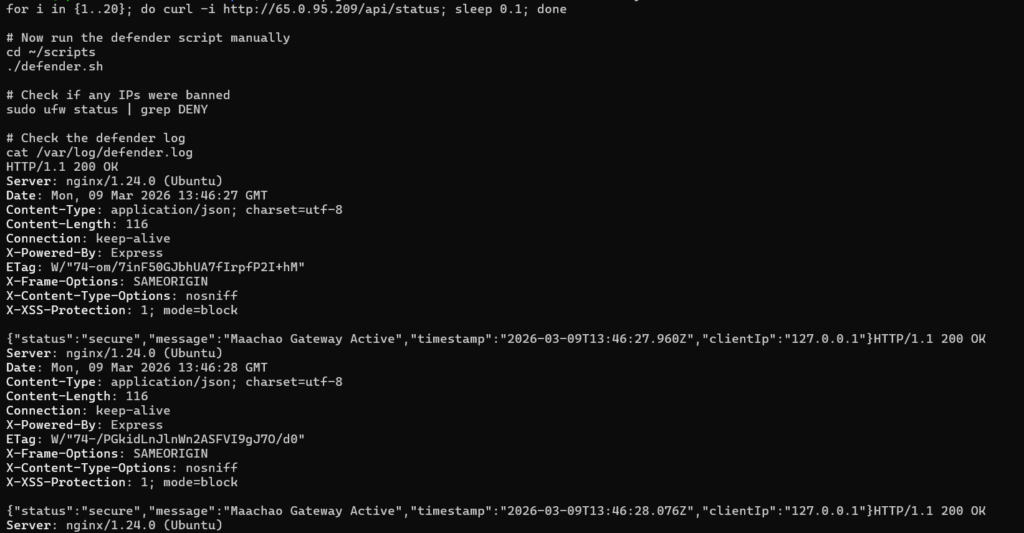
Testing the rate limiting proved more interesting because I needed to generate traffic that would trigger the five requests per second limit. A simple bash loop sending twenty requests with minimal delay between them demonstrated the rate limiting in action, with the first few requests receiving 200 status codes and subsequent requests receiving 429 responses. The Nginx access logs captured every request with the status code, providing the raw data that the defender script would later process.
bash
for i in {1..20}; do
    curl -s -o /dev/null -w "%{http_code}\\n" <http://localhost/api/status>
    sleep 0.05
done
The defender script required its own testing regimen. I first ran it manually after generating sufficient 429 errors to ensure it correctly identified the offending IPs. The script’s logging proved invaluable during this phase, showing exactly which IPs it found and why it decided to ban them. After confirming manual operation worked correctly, I installed the cron job and watched the logs to verify automatic execution. The syslog entries confirmed cron was running the script every minute, and the defender log showed the script executing and finding no new IPs to ban after the initial cleanup.
Lessons Learned and Production Considerations
Throughout this project, I learned that security is never a one-time configuration but an ongoing process of monitoring and refinement. The active defense script represents this philosophy perfectly because it continuously adapts to attack patterns rather than relying on static rules. However, I also learned the importance of building safety mechanisms into automated defense systems. The script’s validation of IP addresses prevents malformed log entries from causing firewall errors, and the duplicate checking ensures we don’t waste system resources on redundant rules.
In production, I would extend this basic framework with additional features like whitelisting for trusted IP ranges, geolocation-based blocking, and integration with threat intelligence feeds. The logging could feed into a centralized SIEM system for correlation with other security events, and the ban decisions could be reviewed periodically to ensure legitimate users aren’t being blocked permanently. But even in its current form, this gateway provides robust protection against the automated scanning and basic DDoS attacks that plague modern web infrastructure.
Conclusion
Building this production-ready anti-DDoS gateway taught me that effective security comes from layering multiple complementary technologies rather than relying on any single solution. The combination of AWS security groups, UFW firewall rules, Nginx rate limiting, and a custom active defense script creates a protective ecosystem where each component addresses the weaknesses of the others. The firewall stops broad scanning and unauthorized access attempts, Nginx handles application-layer attacks through rate limiting, and the defender script provides adaptive response that grows stronger with each attack.
The complete implementation demonstrates how combining standard Linux tools with thoughtful scripting creates security solutions that exceed the capabilities of any single component. For organizations running high-frequency networking services, this layered approach isn’t just good practice but essential survival in an increasingly hostile internet environment. By sharing this detailed walkthrough, I hope other engineers can implement similar protections for their own infrastructure and avoid the trial-and-error process that taught me these valuable lessons. The code and configurations are available for reference, but more importantly, the principles of defense in depth, least privilege, and automated response should guide any serious security architecture.
