Introduction
Modern applications rarely run in a single environment. Instead, teams usually maintain development, staging, and production environments. Each environment serves a different purpose. Developers test new features in development, teams validate releases in staging, and production runs the live system used by real users.
However, managing these environments manually in the AWS console quickly becomes repetitive and error-prone. As projects grow, this manual approach also increases the risk of configuration mistakes. Therefore, many teams now use Infrastructure as Code to define and manage cloud infrastructure.
Terraform provides a simple and powerful solution for this problem. With Terraform, engineers write infrastructure definitions in code and deploy them automatically. As a result, teams can recreate the same infrastructure consistently across multiple environments.
This tutorial demonstrates a Terraform multi environment AWS deployment using Terraform workspaces. The setup will include development, staging, and production infrastructure. We will create a custom VPC, launch an EC2 instance inside that VPC, and configure secure SSH access using a key generated with ssh-keygen. Meanwhile, Terraform workspaces will isolate each environment while still allowing us to reuse the same configuration.
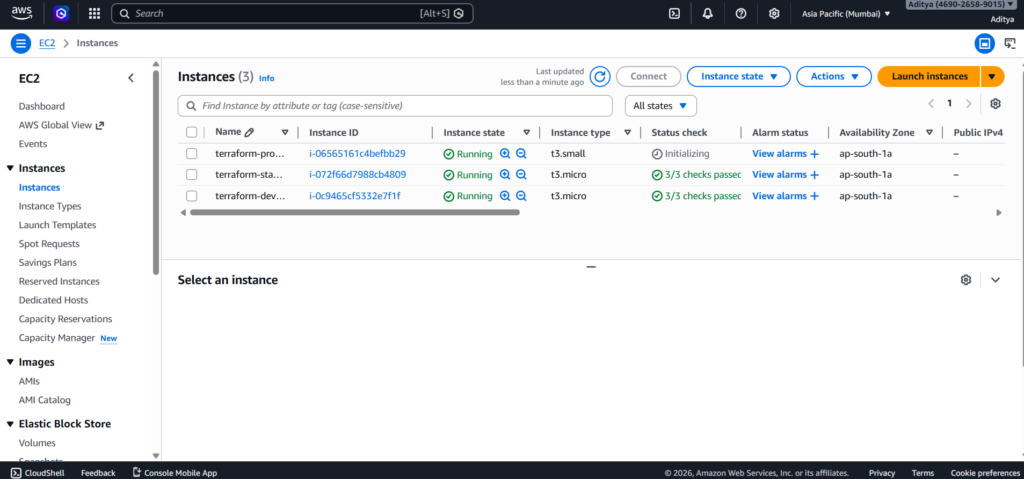
Finally, the infrastructure will automatically select different EC2 instance sizes depending on the environment. Development and staging will run on t3.micro instances, while production will use a t3.small instance.
Prerequisites
Before starting, make sure Terraform and the AWS CLI are installed on your system. In addition, you must configure AWS credentials locally so Terraform can interact with your account. This tutorial uses the ap-south-1 region, although you can change the region if necessary.
Next, generate an SSH key that will allow you to connect to the EC2 instance securely.
ssh-keygen -t rsa -b 4096 -f adityakeyy
This command creates two files. The private key remains on your machine and allows SSH access to the server. Meanwhile, the public key will be associated with the EC2 instance so AWS can verify the connection.
Project Structure
First, create a simple Terraform project structure. A clear structure helps maintain the infrastructure code and makes the project easier to understand.
multi-env-terraform
│
├── main.tf
├── provider.tf
├── variables.tf
├── outputs.tf
The provider file defines the cloud provider. Meanwhile, the main file contains the infrastructure resources. The outputs file prints useful values such as the EC2 public IP address.
Configure the AWS Provider
Next, configure the AWS provider so Terraform knows which cloud platform to use.
provider "aws" {
  region = "ap-south-1"
}
After writing the provider configuration, initialize the project.
terraform init
During initialization, Terraform downloads the required AWS provider plugins and prepares the working directory.
Defining Environment-Specific Instance Types
Each environment should run on different instance sizes. Terraform workspaces allow us to dynamically select the correct instance type depending on the current environment.
locals {
  instance_types = {
    dev     = "t3.micro"
    staging = "t3.micro"
    prod    = "t3.small"
  }
}
Terraform automatically reads the active workspace name using terraform.workspace. This value is used to select the appropriate instance type.
Creating the Custom VPC
Next, we create a Virtual Private Cloud. The VPC provides an isolated network where our AWS resources can run securely.
resource "aws_vpc" "main" {
  cidr_block = "10.0.0.0/16"

  tags = {
    Name = "terraform-${terraform.workspace}-vpc"
  }
}
This configuration creates a new VPC with a CIDR block of 10.0.0.0/16. In addition, the workspace name is included in the resource tag so we can easily identify resources belonging to each environment.
Creating the Public Subnet
The EC2 instance must be deployed in a subnet that can reach the internet. A public subnet is created within the VPC, and automatic public IP assignment is enabled.
resource "aws_subnet" "public" {
  vpc_id                  = aws_vpc.main.id
  cidr_block              = "10.0.1.0/24"
  map_public_ip_on_launch = true
  availability_zone       = "ap-south-1a"

  tags = {
    Name = "terraform-${terraform.workspace}-subnet"
  }
}
Configuring Internet Access
Internet connectivity requires an Internet Gateway and a route table that directs outbound traffic to that gateway.
resource "aws_internet_gateway" "gw" {
  vpc_id = aws_vpc.main.id
}
resource "aws_route_table" "public" {
vpc_id = aws_vpc.main.id
route {
cidr_block = "0.0.0.0/0"
gateway_id = aws_internet_gateway.gw.id
}
}The subnet is then associated with the route table so instances inside it can access the internet.
resource "aws_route_table_association" "public" {
  subnet_id      = aws_subnet.public.id
  route_table_id = aws_route_table.public.id
}
Configuring SSH Access
To connect to the instance securely, we create a security group that allows SSH traffic on port 22.
resource "aws_security_group" "ssh_sg" {
  name   = "terraform-${terraform.workspace}-sg"
  vpc_id = aws_vpc.main.id

  ingress {
    from_port   = 22
    to_port     = 22
    protocol    = "tcp"
    cidr_blocks = ["0.0.0.0/0"]
  }

  egress {
    from_port   = 0
    to_port     = 0
    protocol    = "-1"
    cidr_blocks = ["0.0.0.0/0"]
  }
}
Launching the EC2 Instance
The EC2 instance is deployed inside the public subnet and attached to the security group. The instance type changes dynamically based on the active Terraform workspace.
resource "aws_instance" "app_server" {

  ami           = "ami-0f5ee92e2d63afc18"
  instance_type = local.instance_types[terraform.workspace]

  subnet_id = aws_subnet.public.id

  vpc_security_group_ids = [
    aws_security_group.ssh_sg.id
  ]

  key_name = "adityakeyy"

  tags = {
    Name = "terraform-${terraform.workspace}-instance"
  }
}
Creating Terraform Workspaces
Terraform workspaces allow the same configuration to manage multiple environments. Each workspace maintains its own state file.
terraform workspace new dev
terraform workspace new staging
terraform workspace new prod
Switching between environments is simple.
terraform workspace select dev
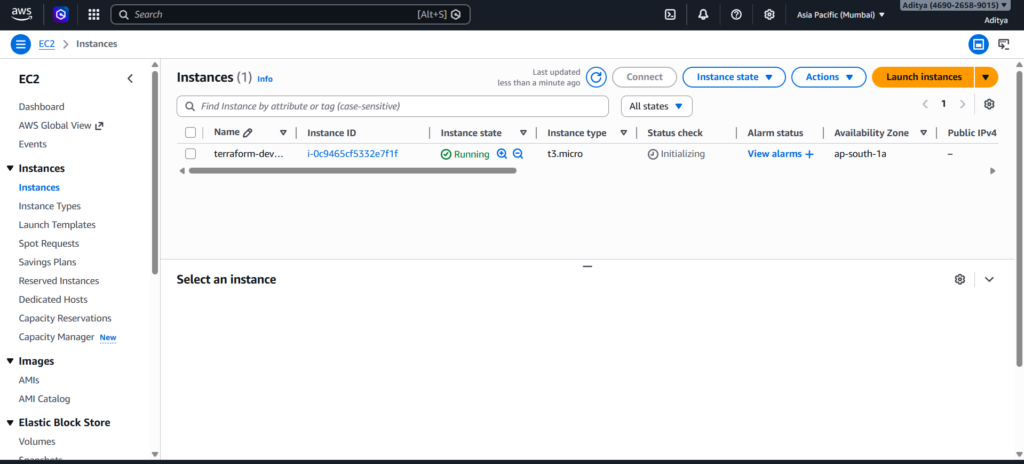
After selecting a workspace, Terraform deploys infrastructure specifically for that environment.
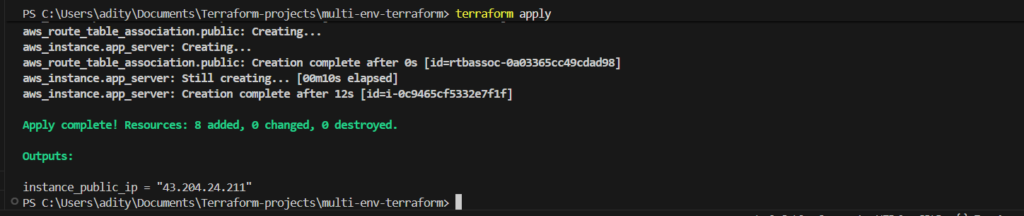
terraform apply
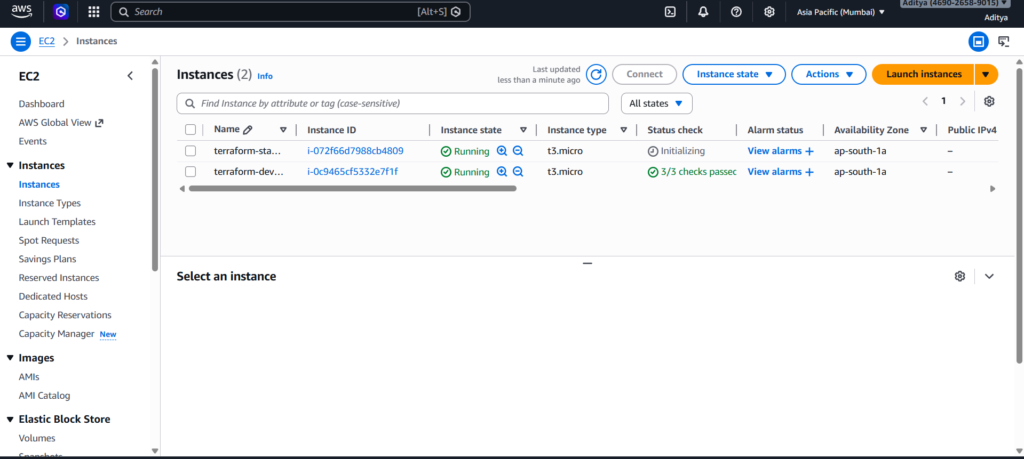
The same process can be repeated for staging and production.
Connecting to the EC2 Instance
After Terraform finishes deploying the infrastructure, the public IP of the instance is displayed in the output.
output "instance_public_ip" {
  value = aws_instance.app_server.public_ip
}
You can then connect to the instance using SSH.
ssh -i adityakeyy ubuntu@PUBLIC-IP
This confirms that the infrastructure is correctly deployed and accessible.
Cleaning Up Infrastructure
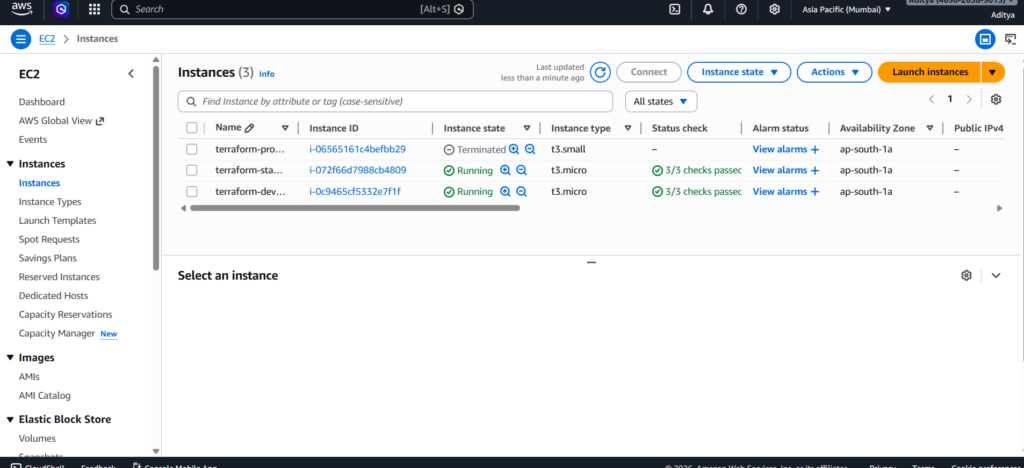
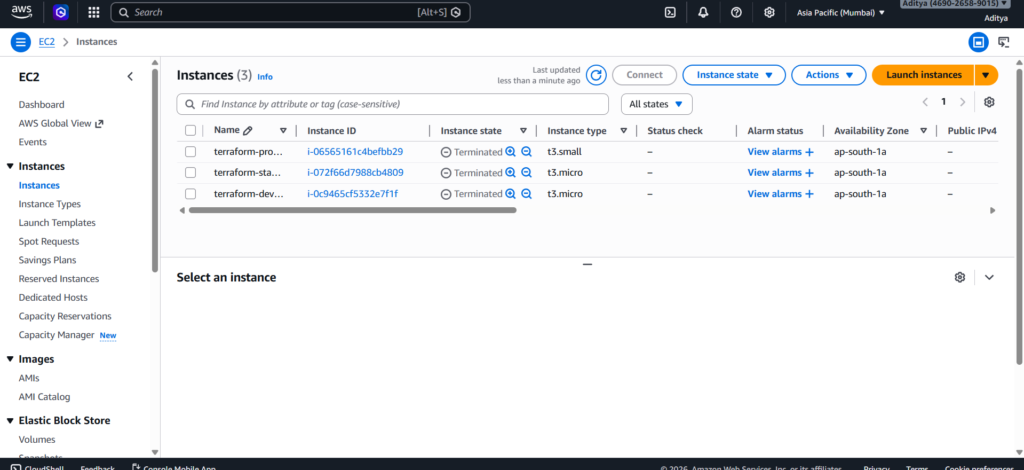
Infrastructure created for testing should be removed after use to avoid unnecessary costs. Terraform can destroy all resources associated with the active workspace.
terraform destroy
Running this command ensures the environment is completely removed while keeping the configuration files intact. Make sure to destroy all instances by switching workspaces.

Conclusion
Terraform makes it easy to manage infrastructure across multiple environments. Instead of creating resources manually, teams can define infrastructure in code and deploy it consistently. As a result, developers gain better control, repeatability, and reliability.
In this tutorial, we deployed a multi-environment infrastructure on AWS using Terraform workspaces. We created a custom VPC, configured networking components, launched EC2 instances with environment-specific sizes, and enabled secure SSH access.
Because the entire infrastructure now exists as code, we can recreate or destroy it at any time. Therefore, this approach provides a powerful and scalable way to manage cloud environments in modern DevOps workflows.
A Terraform multi environment AWS setup allows teams to manage infrastructure across development, staging, and production environments. With Terraform multi environment AWS deployments, engineers can maintain consistent infrastructure while reducing manual configuration errors.
