Introduction
Running Jenkins in production means your CI/CD pipelines are the backbone of your entire development workflow. Every job configuration, build history, plugin, and user setting lives inside Jenkins — and losing that data can bring your team to a complete stop.
In this guide, you will perform a complete Jenkins backup and restore on AWS EC2 without stopping the service for even a second. First, you will verify Jenkins is running. Then, you will create a live compressed backup of all Jenkins data. After that, you will simulate real data loss by deleting everything. Finally, you will restore Jenkins completely from the backup and verify every job and build history is recovered.
This is exactly how production DevOps teams protect their Jenkins installations — and by the end of this guide, your Jenkins backup on AWS EC2 will be fully tested and verified.
First, you will install Jenkins on EC2. Next, you will verify it is running. Then, you will create a live backup. After that, you will simulate data loss. Finally, you will restore everything and confirm full recovery.
What Needs to Be Backed Up?
Jenkins stores all its critical data in one single directory:
/var/lib/jenkinsThis directory contains everything Jenkins needs to run:
| Data | Description |
|---|---|
| Job configurations | All pipeline and freestyle job settings |
| Build history | Logs and results of every past build |
| Plugins | All installed Jenkins plugins |
| User data | User accounts and permissions |
| System configuration | Global Jenkins settings |
Therefore, backing up this one directory gives you a complete recovery point for your entire Jenkins installation.
Pre-requisite: Install Jenkins on AWS EC2
Before starting the backup process, Jenkins must be installed and running on your EC2 instance. Follow these steps to set it up from scratch.
First, install Java — Jenkins requires it to run:
sudo apt update
sudo apt install fontconfig openjdk-17-jre -y
Verify Java is installed correctly:
java -versionNext, add the Jenkins repository and install Jenkins:
# Add Jenkins GPG key
sudo wget -O /usr/share/keyrings/jenkins-keyring.asc https://pkg.jenkins.io/debian-stable/jenkins.io-2023.key

# Add Jenkins repository to sources
echo "deb [signed-by=/usr/share/keyrings/jenkins-keyring.asc] https://pkg.jenkins.io/debian-stable binary/" | sudo tee /etc/apt/sources.list.d/jenkins.list > /dev/null

# Update package list and install Jenkins
sudo apt update
sudo apt install jenkins -y
Then start and enable Jenkins:
sudo systemctl start jenkins
sudo systemctl enable jenkins
Finally, open Jenkins in your browser:
http://<your-ec2-public-ip>:8080Get your initial admin password:
sudo cat /var/lib/jenkins/secrets/initialAdminPassword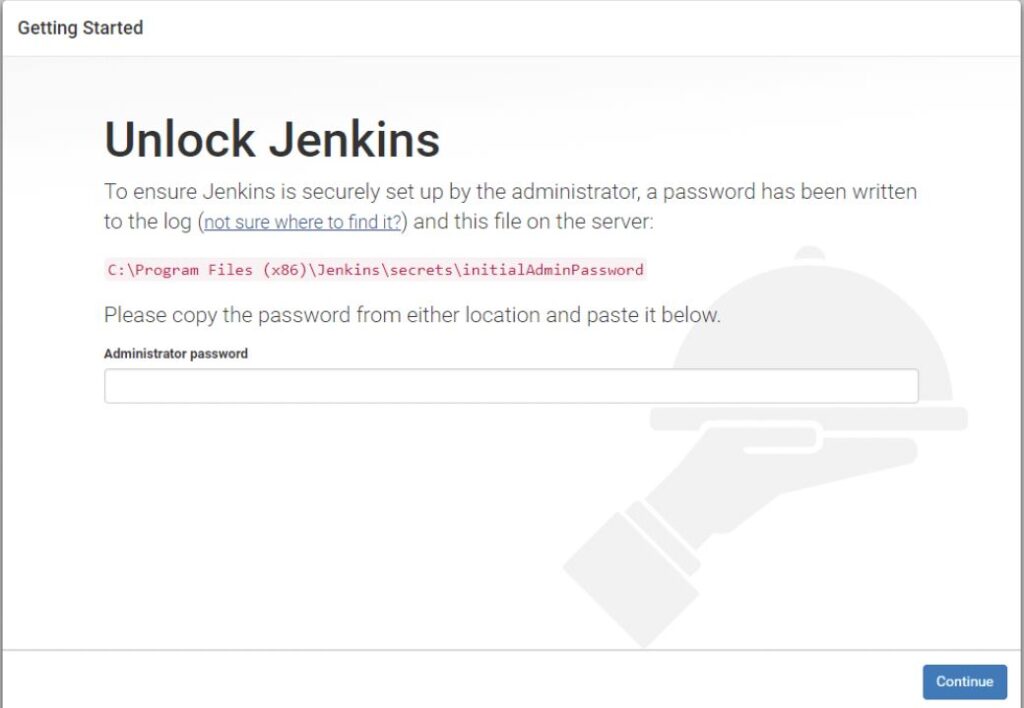
Copy the password, paste it into the browser, click Install Suggested Plugins, create your admin user, and complete the setup wizard.
Step 1: Verify Jenkins is Running on AWS EC2
Before taking any backup, first confirm that Jenkins is fully operational. This is important because it proves the backup is taken from a live, running service.
sudo systemctl status jenkinsExpected output:
Active: active (running)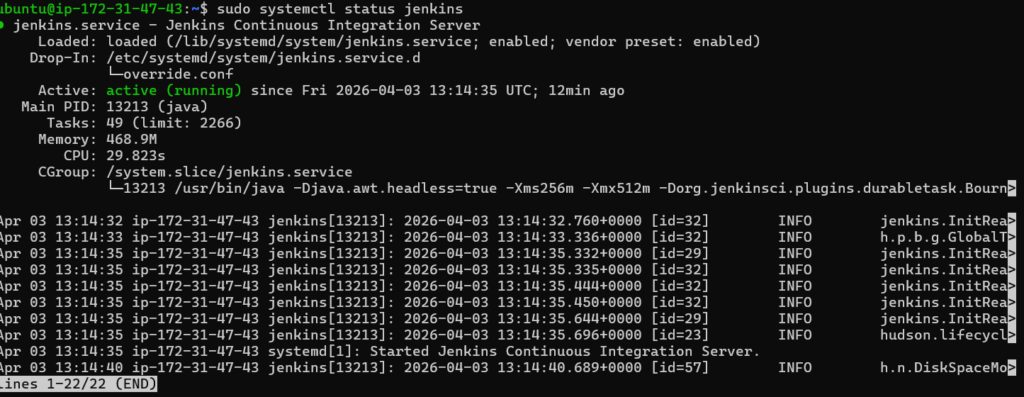
Step 2: Check Your Jenkins Jobs
Next, verify that your jobs exist inside the Jenkins data directory. This gives you a clear before-and-after comparison for the restore step.
sudo ls /var/lib/jenkins/jobs/
You should see both jobs listed — confirming real data exists and is worth protecting.
Step 3: Take the Live Backup (Zero Downtime)
Now perform the actual live backup. We use the tar command to create a single compressed archive of the entire Jenkins data directory. The key point here is that Jenkins keeps running throughout this entire process — no downtime, no dropped builds, no service interruption.
# Navigate to home directory
cd ~

# Create compressed backup of entire Jenkins directory
sudo tar -czvf jenkins_backup.tar.gz /var/lib/jenkins

# Verify the backup file was created successfully
ls -lh jenkins_backup.tar.gz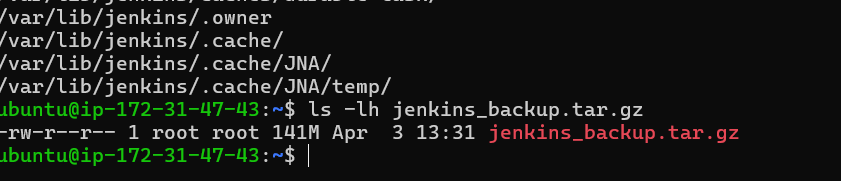
Flag reference:
| Flag | Purpose |
|---|---|
| -c | Create a new archive |
| -z | Compress using gzip |
| -v | Show files as they are archived |
| -f | Specify the output filename |
Step 4: Prove Zero Downtime During Backup
This is the most important part of a live backup strategy. While the backup was running in your terminal, Jenkins continued serving traffic without any interruption.
Open your browser and navigate to:
http://<your-ec2-public-ip>:8080
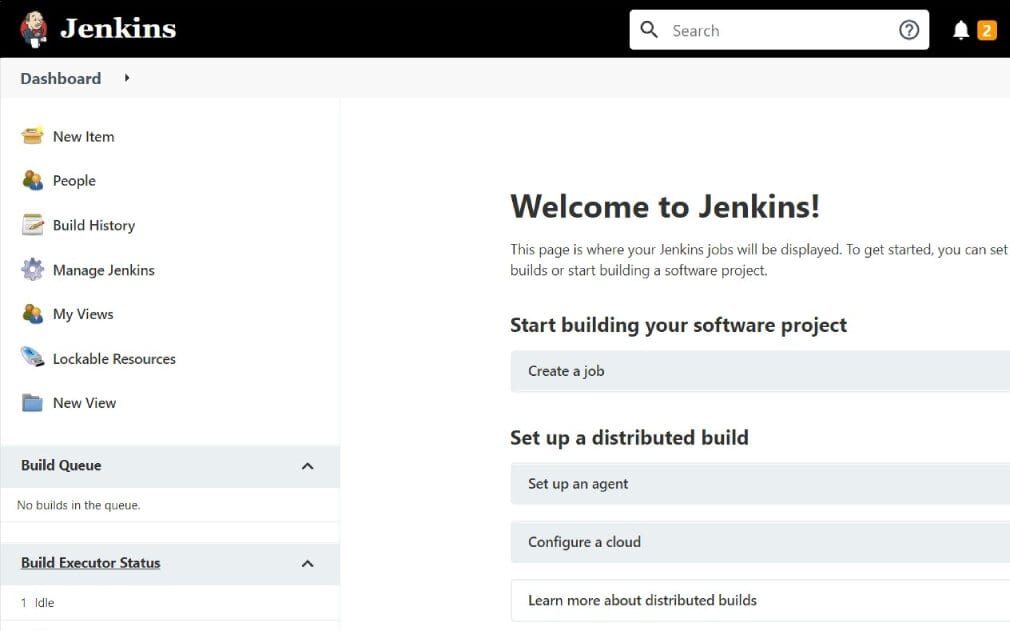
As a result, this screenshot proves your Jenkins backup on AWS EC2 was completed with complete zero downtime. Your pipelines kept running, your builds kept executing, and your users experienced no disruption.
Step 5: Simulate Data Loss
To properly test the restore process, we will now deliberately delete all Jenkins data. This simulates a real-world scenario — an accidental deletion, a failed migration, or a corrupted Jenkins directory.
First, take a screenshot of your Jenkins dashboard so you have a clear record of what existed before the loss.
Then run this command in your terminal:
# Delete all Jenkins data
sudo rm -rf /var/lib/jenkins/*

# Confirm the directory is now empty
sudo ls /var/lib/jenkins/
Now refresh Jenkins in your browser. The service will be broken — showing an error page or completely blank UI.
This is exactly the scenario your backup exists to solve.
tep 6: Restore Jenkins Backup on AWS EC2
Restoring from a tar backup is straightforward. This single command extracts the entire archive and places every file back at its original location.
sudo tar -xzvf jenkins_backup.tar.gz -C /Restore flag reference:
| Flag | Purpose |
|---|---|
| -x | Extract files from archive |
| -z | Decompress using gzip |
| -v | Show each file as it is restored |
| -C / | Restore files to their original full paths |
After extraction, verify your jobs are back:
sudo ls /var/lib/jenkins/jobs/
Step 7: Fix File Permissions
This step is critical and must not be skipped. After restoring files using sudo, the ownership of the Jenkins directory may have changed. Therefore, Jenkins will fail to start correctly unless you restore proper ownership.
# Give Jenkins full ownership of its directory
sudo chown -R jenkins:jenkins /var/lib/jenkins

# Verify ownership is correctly set
ls -la /var/lib/jenkins/ | head -10
Without this step, Jenkins will throw permission errors even though all files are present.
Step 8: Restart Jenkins Service
Now restart Jenkins to load all the restored data:
sudo systemctl restart jenkins

# Wait 30 seconds then verify status
sudo systemctl status jenkins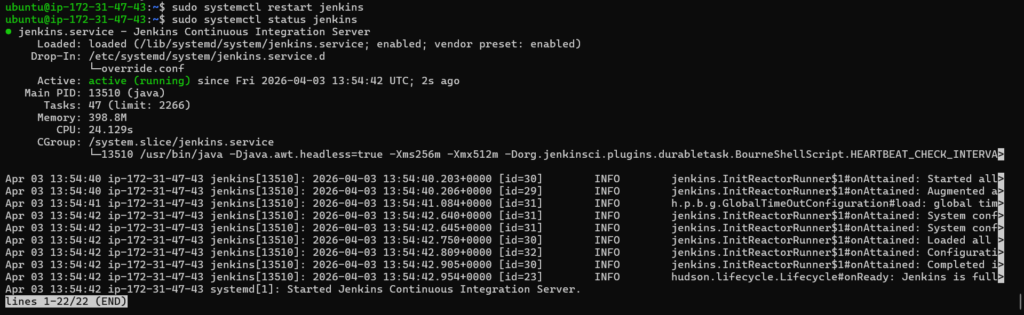
Step 9: Verify Full Restore in Browser
Finally, open Jenkins in your browser and confirm everything is fully recovered:
http://<your-ec2-public-ip>:8080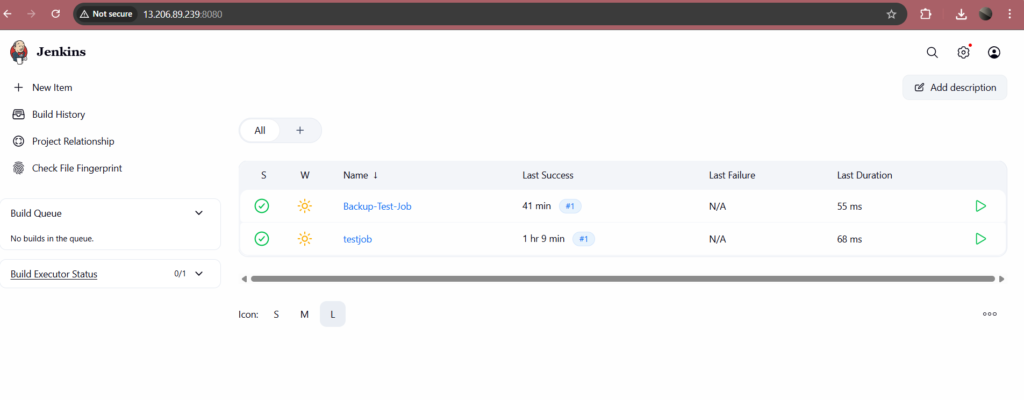
Check each of the following:
| What to Verify | Expected Result |
|---|---|
| Jenkins dashboard loads | UI appears normally |
| My-First-Pipeline | Job visible with build history |
| Backup-Test-Job | Job visible with build history |
| Plugins | All plugins working correctly |
| System configuration | All settings intact |
If everything appears correctly, your Jenkins backup and restore on AWS EC2 is fully verified and working.
Conclusion
In this guide, you completed a full Jenkins backup and restore on AWS EC2 without stopping the service at any point.
First, you verified Jenkins was running. Then, you used the tar command to create a live compressed backup of the entire /var/lib/jenkins directory. After that, you simulated data loss by deleting everything. Finally, you restored all data from the backup, fixed permissions, and confirmed complete recovery in the browser.
Therefore, you now have a reliable, tested backup strategy for Jenkins that works in real production environments. As a next step, consider automating this backup using a cron job to run daily, and uploading the archive to Amazon S3 for secure offsite storage. Additionally, storing your pipeline configurations in Git gives you a second layer of protection that works independently of your file system backup.
Written by Deekshitha R
LinkedIn: www.linkedin.com/in/deekshitha-raveendran-31581527b
