Introduction
When a production server goes down, the real challenge is not the failure itself but how quickly it can be restored. This is where EC2 disaster recovery using EBS snapshot becomes a reliable and efficient solution.
In this guide, I simulated a complete failure of an EC2 instance and rebuilt the system from scratch using an EBS snapshot. The objective was to recover the application and bring it back online with minimal downtime while following a practical, real-world recovery approach.
Setting Up the Initial Environment
I started by launching a t3.micro EC2 instance running Ubuntu 24.04. After connecting via SSH, I installed Nginx and replaced the default page with a custom static website. This gave me a visible way to confirm whether the system was working before and after recovery.

The application itself was intentionally simple. A static page served through Nginx was enough to simulate a real workload while keeping the recovery process focused and clear.

Creating a Backup with EBS Snapshot
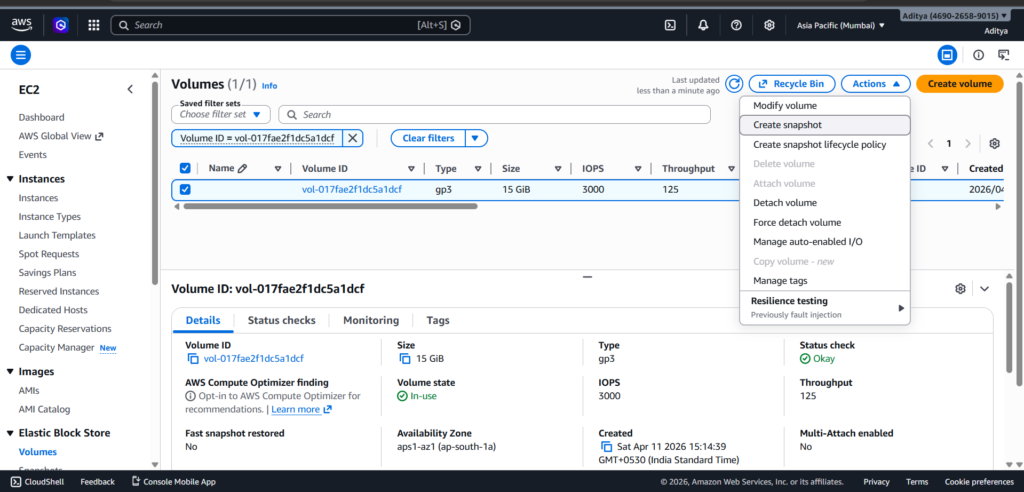
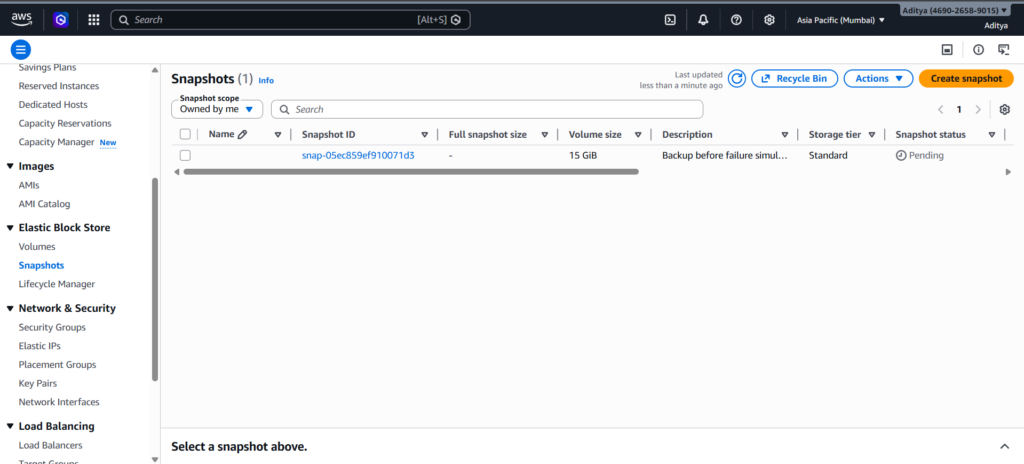
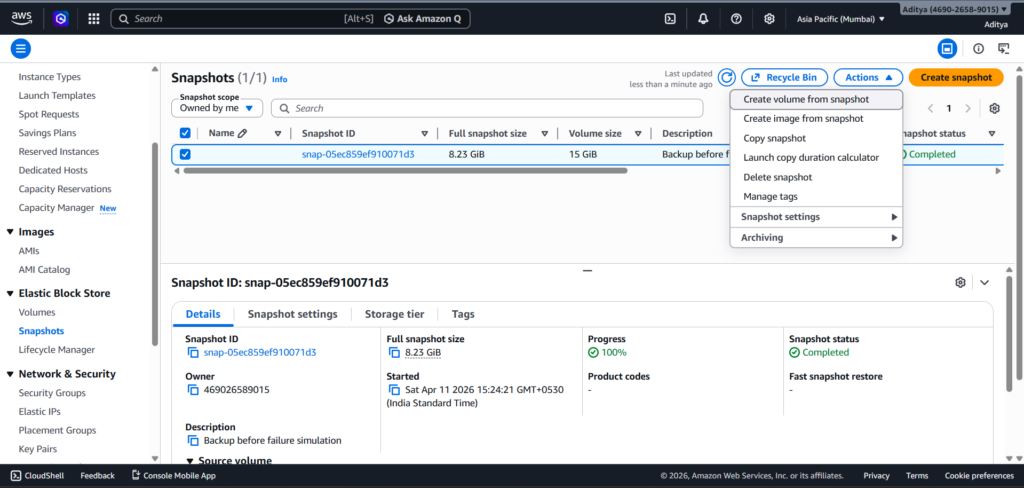
With the application running, the next step was to create a reliable backup. I navigated to the AWS Management Console, located the root volume attached to the instance, and created an EBS snapshot.
This snapshot captured the entire state of the system, including the operating system, installed packages, and the web application files. It effectively became a restore point that I could use later to rebuild the system.
I waited until the snapshot status changed to “Completed” before proceeding, since incomplete snapshots cannot be used for recovery.
Simulating a Complete System Failure
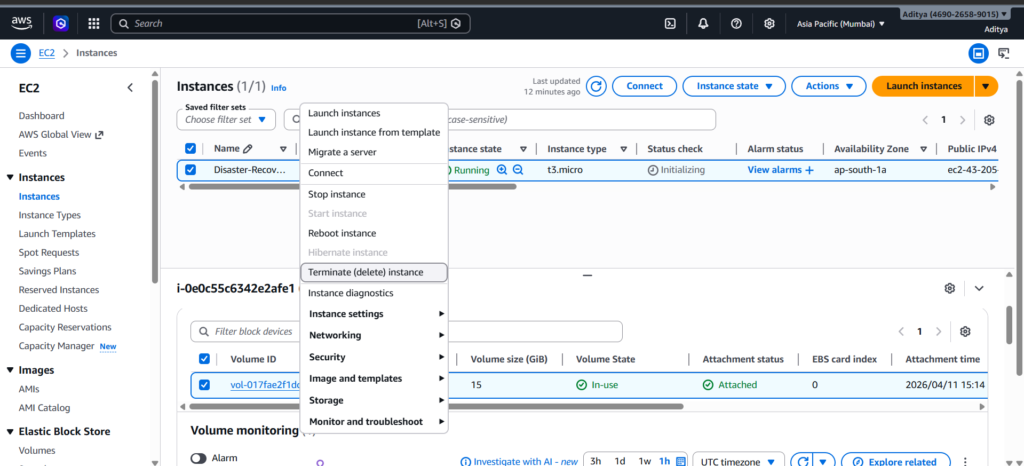
To make the scenario realistic, I terminated the EC2 instance. This removed the running server entirely, including its public IP and attached resources.
At this point, the application was no longer accessible, and the only way to recover it was through the snapshot taken earlier.
Rebuilding from the Snapshot
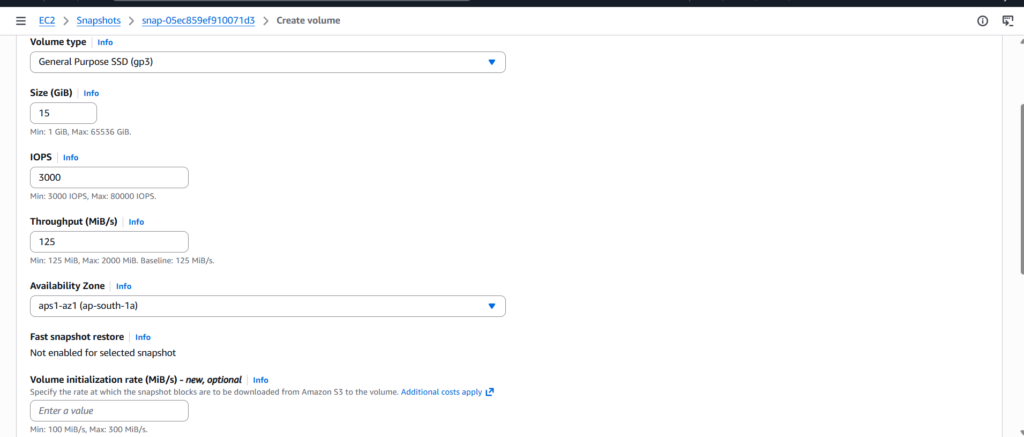
Recovery began by creating a new EBS volume from the snapshot. I made sure to place this volume in the same availability zone where the new EC2 instance would run. This detail is important because volumes can only be attached to instances within the same zone.
Once the volume was ready, I launched a fresh EC2 instance with the same configuration as before. After the instance became available, I attached the recovered volume to it.
Accessing the Recovered Data
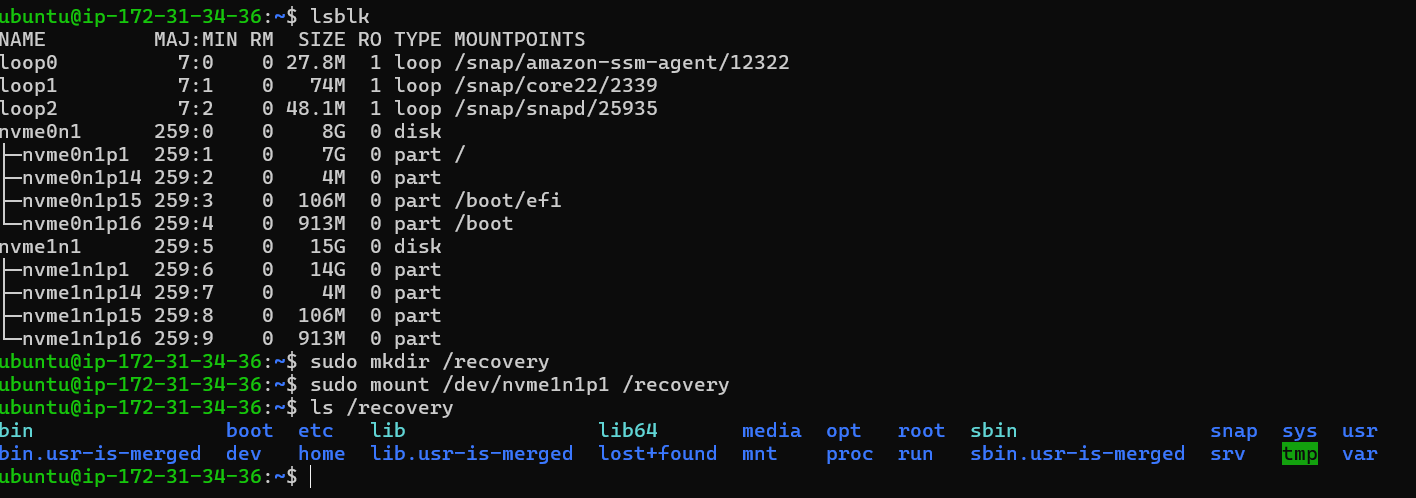
After connecting to the new instance via SSH, I checked the available disks to locate the attached volume. Since modern AWS instances use NVMe naming, the device appeared as a secondary NVMe disk.
To access its contents, I created a mount point and mounted the partition from the recovered volume.
sudo mkdir /recovery
sudo mount /dev/nvme1n1p1 /recovery
Once mounted, I verified the contents and confirmed that the full filesystem from the original instance was present.
Restoring the Application
The recovered volume contained the entire previous system, including the website files stored under the web root directory. Since the new instance was fresh, I first installed Nginx to recreate the web server environment.
sudo apt update
sudo apt install nginx -y
With the server ready, I copied the website files from the mounted volume into the active web directory.
sudo cp -r /recovery/var/www/html/* /var/www/html/
To ensure everything worked correctly, I updated file permissions and restarted Nginx.
sudo chown -R www-data:www-data /var/www/html/
sudo systemctl restart nginx

Verifying the Recovery
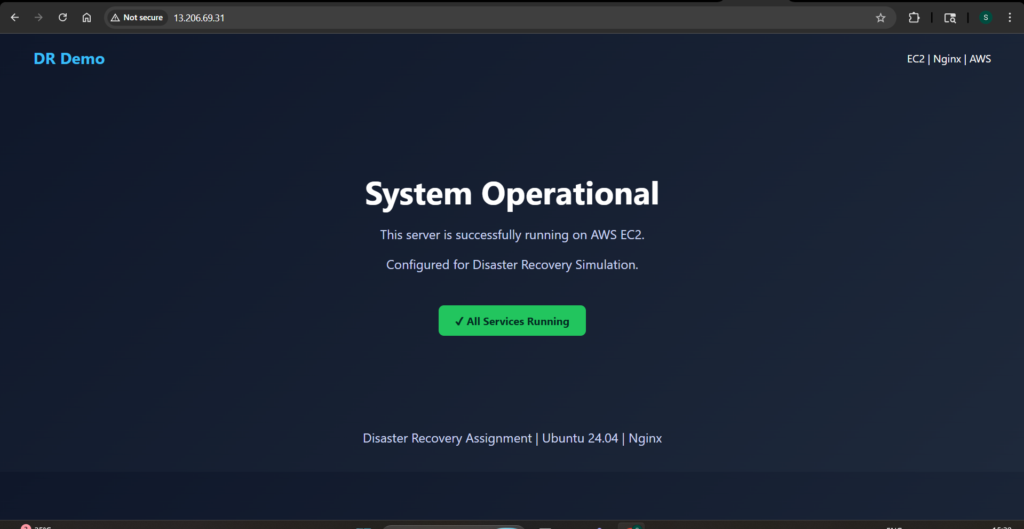
After completing the restoration steps, I accessed the new instance using its public IP address. The same custom webpage loaded successfully, confirming that the application had been fully restored.
This final check validated the entire recovery process. The system had gone from complete failure to a fully functional state using only the snapshot as a backup.
Challenges Faced During Recovery
A few small challenges came up during the process, each offering useful insights.
The snapshot initially remained in a pending state, which prevented further actions. Waiting for it to complete was necessary before moving forward.
The device naming also differed from traditional expectations. Instead of /dev/xvdf, the volume appeared as an NVMe device. Running lsblk helped identify the correct partition.
Another issue appeared when the target directory for the website files did not exist. Installing Nginx resolved this by creating the required directory structure.
Finally, file permissions needed adjustment after copying the data. Without correcting ownership, the web server would not serve the files properly.
Conclusion
This exercise demonstrated a complete disaster recovery workflow on AWS. By creating a snapshot, simulating failure, and restoring from backup, I was able to rebuild the system and recover the application without relying on the original instance.
The process highlights the importance of having reliable backups and understanding how to use them effectively. In a real-world scenario, these steps can significantly reduce downtime and prevent data loss.
More importantly, it reinforces a key DevOps principle: systems will fail, but preparation determines how well you recover.
